Night Sky support
A little help
along the way.
Find your way around Night Sky, manage a subscription, or reach the team.
Is everything running?
Check the latest Night Sky service status. ↗
Subscriptions & refundsManage your subscription.
Find cancellation and Apple billing help. ↗
Contact the teamWe’re here to help.
Get in touch about using Night Sky. ↗
Installation and setup
Technical Requirements for Night Sky 27
Software
Night Sky 27 requires iOS 18 or later on iPhone or iPadOS 18 or later on iPad. Install the latest software available for your device for the best experience. Night Sky 27 is optimised for iOS 27, iPadOS 27, macOS 27 and visionOS 27; individual features depend on your device, software and subscription.
Recommended devices
As a minimum recommendation, choose a device model that originally shipped with iOS 18 or iPadOS 18 or later. This is our recommended hardware starting point; older compatible devices can still run Night Sky with the required software.
- iPhone: iPhone 16, iPhone 16 Plus, iPhone 16 Pro, iPhone 16 Pro Max, iPhone 16e, or newer models.
- iPad: iPad mini (A17 Pro), iPad Air (M3), iPad (A16), or newer models introduced with iPadOS 18 or later.
For Aura’s on-device intelligence, choose an Apple Intelligence-capable device, such as an iPhone 16 model, iPad mini (A17 Pro) or iPad Air (M3), and keep its software up to date. iPad (A16) supports the core app but does not support Apple Intelligence. On-device Aura features require compatible software and available Apple Foundation Models; when these are unavailable, Aura uses an online fallback.
Night Sky is also available on Mac, Apple Vision Pro, Apple Watch and Apple TV. Check Night Sky’s App Store listing on your device for its platform-specific compatibility requirements. AirPods Pro or AirPods Max can be used with supported spatial audio features.
Device information: iPhone 16, iPad mini (A17 Pro), iPad Air (M3) and iPad (A16), and Apple Intelligence compatibility.
Internet connection and downloads
Connect to Wi-Fi or mobile data to install Night Sky and download any additional content. Night Sky 27 has a smaller initial download, with additional content delivered when needed, so allow downloads to finish before heading somewhere without a connection.
Once setup and the content you need are downloaded, the core sky view can be used offline. Widgets, Stargazing Conditions, Night Sky Tonight, news and satellite-data updates need an internet connection. Aura also needs a connection when using its online fallback; on-device support does not mean every Aura interaction is available offline.
Installing Night Sky
- Open the App Store on your device and search for Night Sky.
- Choose Get, or update your existing installation to Night Sky 27. Sign in to your Apple Account if asked.
- Open Night Sky, follow the setup prompts and allow location access to show the sky for where you are.
- Hold your iPhone or iPad towards the sky to identify the stars, planets and other objects on screen.
Night Sky is free to download. Optional Night Sky + and Night Sky + Aura subscriptions unlock additional features; Aura Sky Tours require Night Sky + Aura.
Permissions
- Location: provides an accurate Sky View, local stargazing information and location-based notifications.
- Notifications: lets Night Sky alert you to stargazing conditions, rising objects, ISS and Starlink flyovers, news and events. Choose which alerts you want in the app’s settings.
- Calendar: supports tour suggestions for trips and reminders about astronomical events.
- Camera: is used for Night Sky Blending, augmented reality and astrophotography when you use those features.
- Microphone: allow microphone access when prompted to speak with Aura. You can also ask typed questions.
You can review permissions in your device’s settings. See our Privacy Policy for information about data use.
What’s new in Night Sky 27
Explore with Aura Sky Tours
Aura Sky Tours turn a visit to the sky into a spoken conversation. A Night Sky + Aura subscription is required. On iPhone and iPad, choose the experience that suits what you want to explore:
- Aura Tonight creates a personalised spoken tour of the stars, planets, constellations and celestial events visible from your location tonight. Use it to discover the highlights of the evening sky.
- Aura Live gives real-time spoken guidance as you point your iPhone or iPad towards the sky. You can interrupt the tour at any moment to ask a question naturally, then hear Aura’s answer.
- Aura Anywhere recreates the sky for a location, date and time of your choice and builds a tour around it. Use it to explore another place, revisit a memorable night or plan a future stargazing session.
Speak naturally with Aura
On iPhone, iPad, Mac and Apple Vision Pro, Aura speaks throughout a tour, accepts spoken questions and replies aloud. Ask about something that catches your attention or follow up on what Aura has just explained. Choose your preferred voice in Preferences.
You can also ask Aura a question using the floating question suggestions or by typing in Night Sky’s search field. Responses appear in a chat interface, with relevant action buttons when Aura can take you directly to an object, information or another Night Sky feature.
Understand on-device intelligence
On supported devices, Apple Foundation Models create tours and handle most interactions directly on your device. When these models are unavailable, or a question needs deeper astronomical knowledge, Aura uses OpenAI as a fallback. The processing used can therefore vary with your device and your question.
Support for Night Sky itself does not mean that every on-device intelligence feature is available. Aura remains an optional part of Night Sky; its use is covered by the Terms and Conditions and Privacy Policy.
Find the sky with Siri and Spotlight
On iPhone, iPad and Mac, ask Siri questions such as “What star is that?” or “Where is Mars?” to access Night Sky features. You can also search for celestial objects in Spotlight. Stars, planets, constellations and other objects are indexed there, giving you another way to find them beyond Night Sky’s own search.
Explore on Mac and Apple Vision Pro
On Mac, Aura Tonight brings a spoken tour of your evening sky to the desktop, while Aura Anywhere lets you explore a different location, date and time. Apple Vision Pro offers immersive Aura-powered tours. Both platforms support spoken questions and answers during tours.
The Space Exploration Timeline on iPhone, iPad, Mac and Apple Vision Pro now includes the latest milestones in space exploration. Open the timeline to browse the history of missions and discoveries beyond Earth.
Downloads, windows and sky tracking
Night Sky 27 has a smaller initial download on iOS, iPadOS and visionOS, with additional content downloaded on demand when needed. These platforms also benefit from faster launching, helping you begin exploring sooner.
On iPhone and iPad, the app supports full resizability. During sky tracking, an automatic warning appears when your device points directly at the Sun.
New language support
Night Sky 27 adds Bangla, Gujarati, Kannada, Malayalam, Marathi, Odia, Punjabi, Slovenian, Tamil, Telugu and Urdu on iPhone, iPad, Mac, Apple Vision Pro and Apple TV. On iPhone and iPad, use Change Language in Night Sky’s settings to open your device’s language settings. Your preferred Aura voice is selected separately in Preferences.
Sky View
Sky View
Sky View is the heart of Night Sky.
Sky View presents you with a real-time simulation of the sky as currently seen from your own location or other location of your choice. Over 1.7 billion stars are included. It is a 360° view and you can move it around with your finger or by moving your device (iPhone, iPad and Apple Watch only). On Apple Mac devices you can move around Sky View with your mouse or arrow keys.
You can zoom in on an object by “pulling apart” with two fingers on iPhones and iPads. To zoom in on Apple Mac devices, you can either double tap on the trackpad or double click the mouse.
As you zoom in more stars will become visible. An angular scale bar will appear at the top of the screen as you zoom in. This scale bar disappears when you stop zooming.
To zoom out “pinch in” with two fingers.
In Sky View, the Earth is “transparent” allowing you to look down to see the locations of objects under the horizon. If you zoom out when you are looking down, the view changes to a 3D model of the Earth (Night Sky+ feature only). You can turn this feature off in the Preferences section.
Sky Appearance
The sky appears a deep blue in Sky View at all times, but in the Preferences menu there is an option to give the daytime sky a lighter blue hue. At higher zoom levels the sky background colour will change to black.
In default view, the horizon is shown as a purple line. There are cardinal point indicators (N, E, S, W etc) located on the horizon to show the direction you are facing. A compass rose is also placed high in the sky.
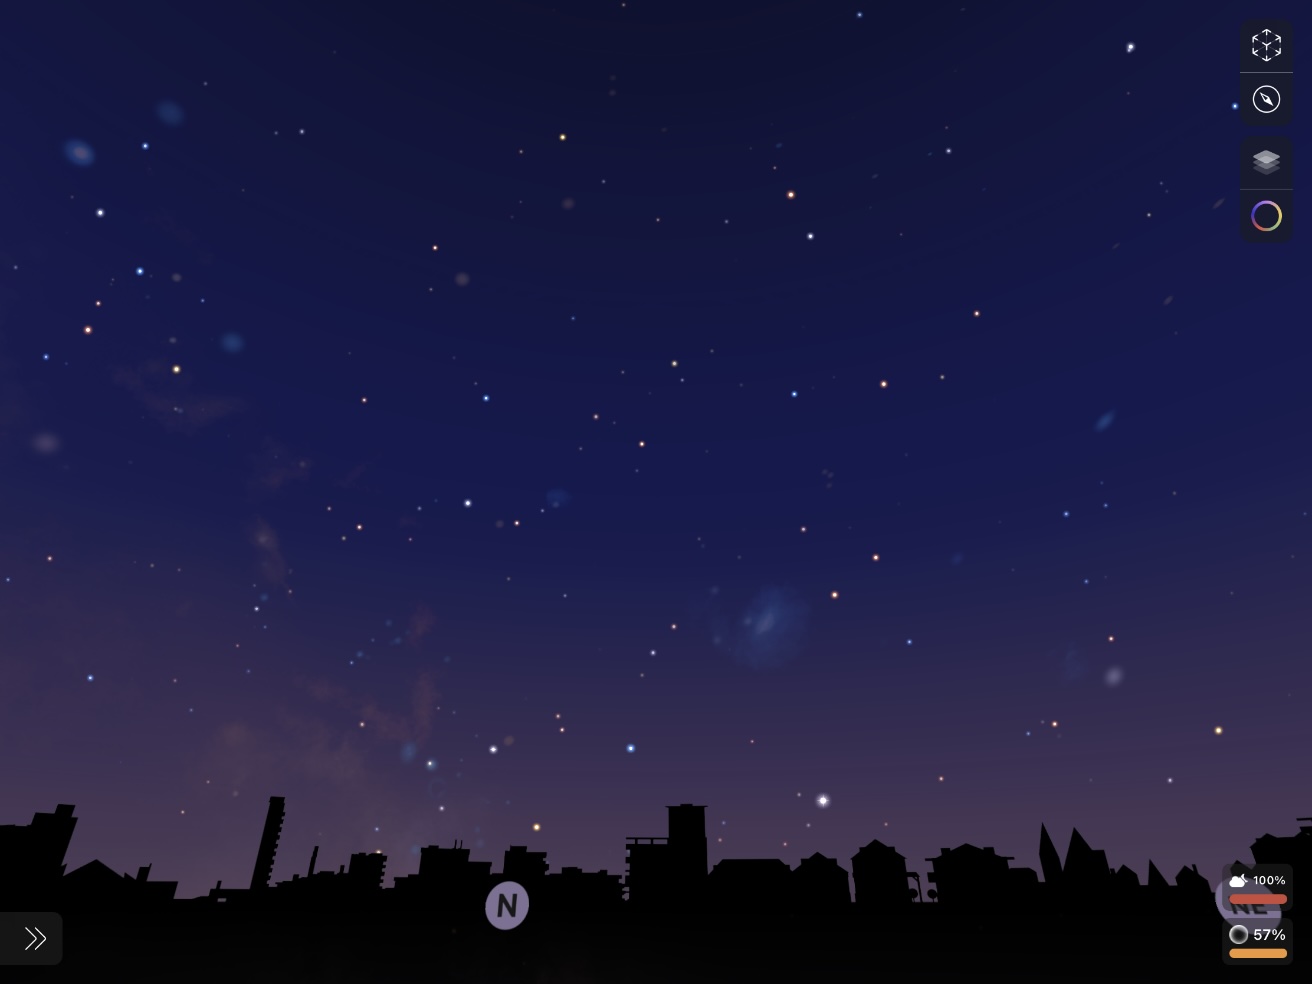
You can choose for the app to display a simulated environment on the horizon (above) in the Preferences menu. These include decorative simulations of generic urban landscapes and simulations of the skyline visible from New York City, London, Paris and other major cities. The app selects an appropriate environment based on your location. The displayed environment is representational only and may not match the view from a precise location.
The stars are grouped into areas of the sky called constellations which are defined by some of the star patterns described by ancient civilisations or created by astronomers in historical times. Night Sky displays the 88 constellations accepted by the International Astronomical Union (IAU).
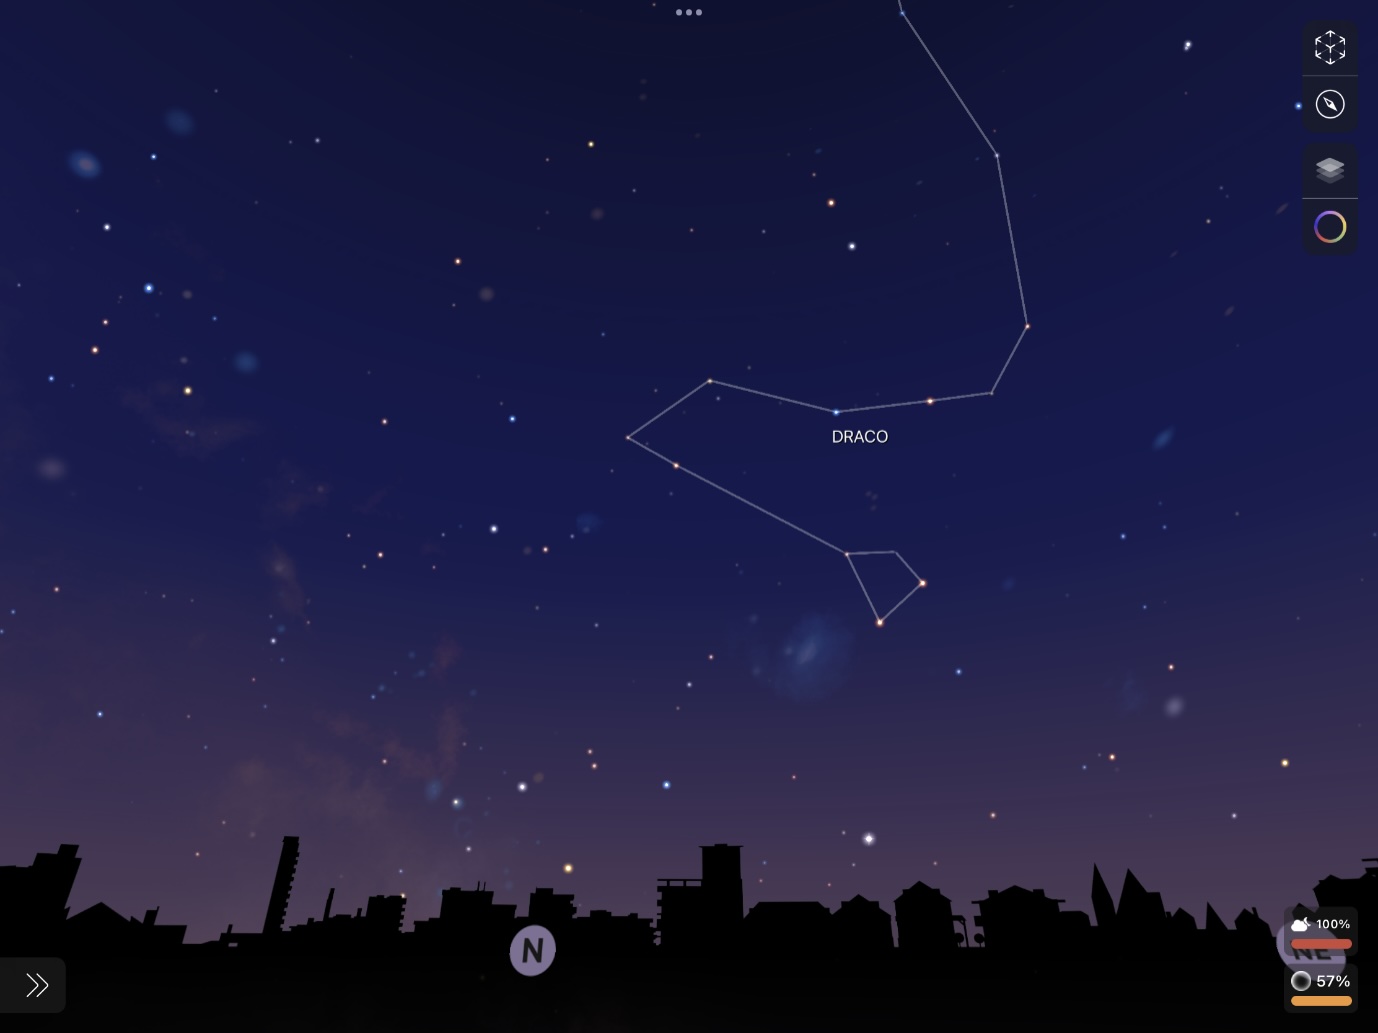
You can make these constellations more apparent in Sky View by selecting “Show constellation lines” in the Preferences section. This will highlight the constellation’s shape by adding lines joining the brightest stars in the constellation.
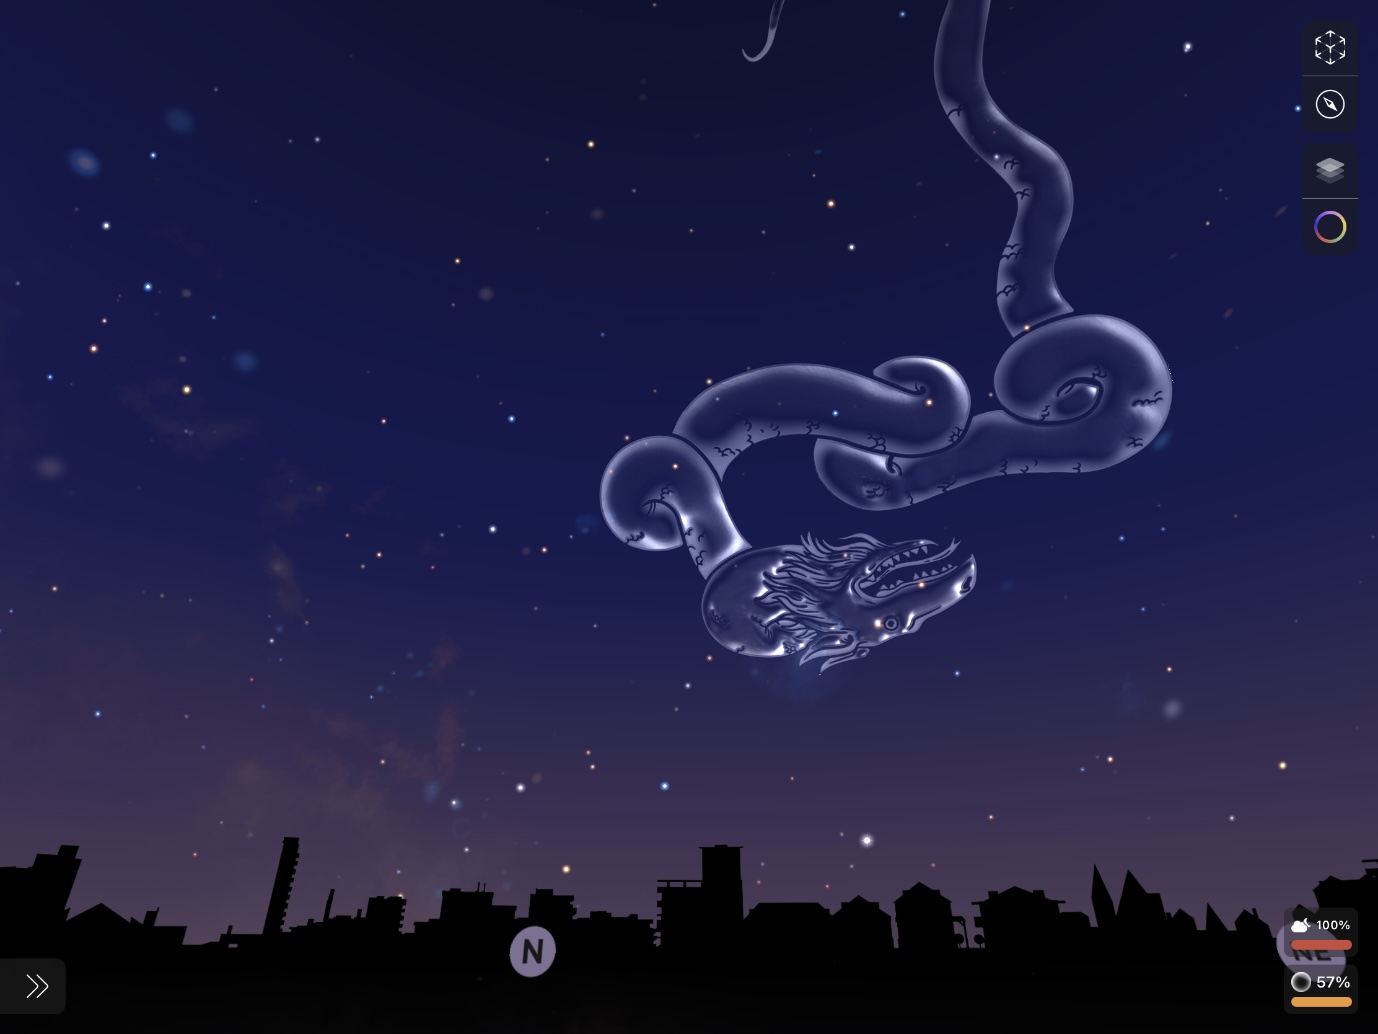
For a historic perspective on the sky, you can add “Glass Mythology” figures to Sky View from the Preferences section. These appear as transparent artistic impressions of the people, creatures and objects which inspired the constellations.
Both the constellation lines and glass mythology figures can be made to fade away or entirely removed if you prefer. You can do this in the Preferences menu.
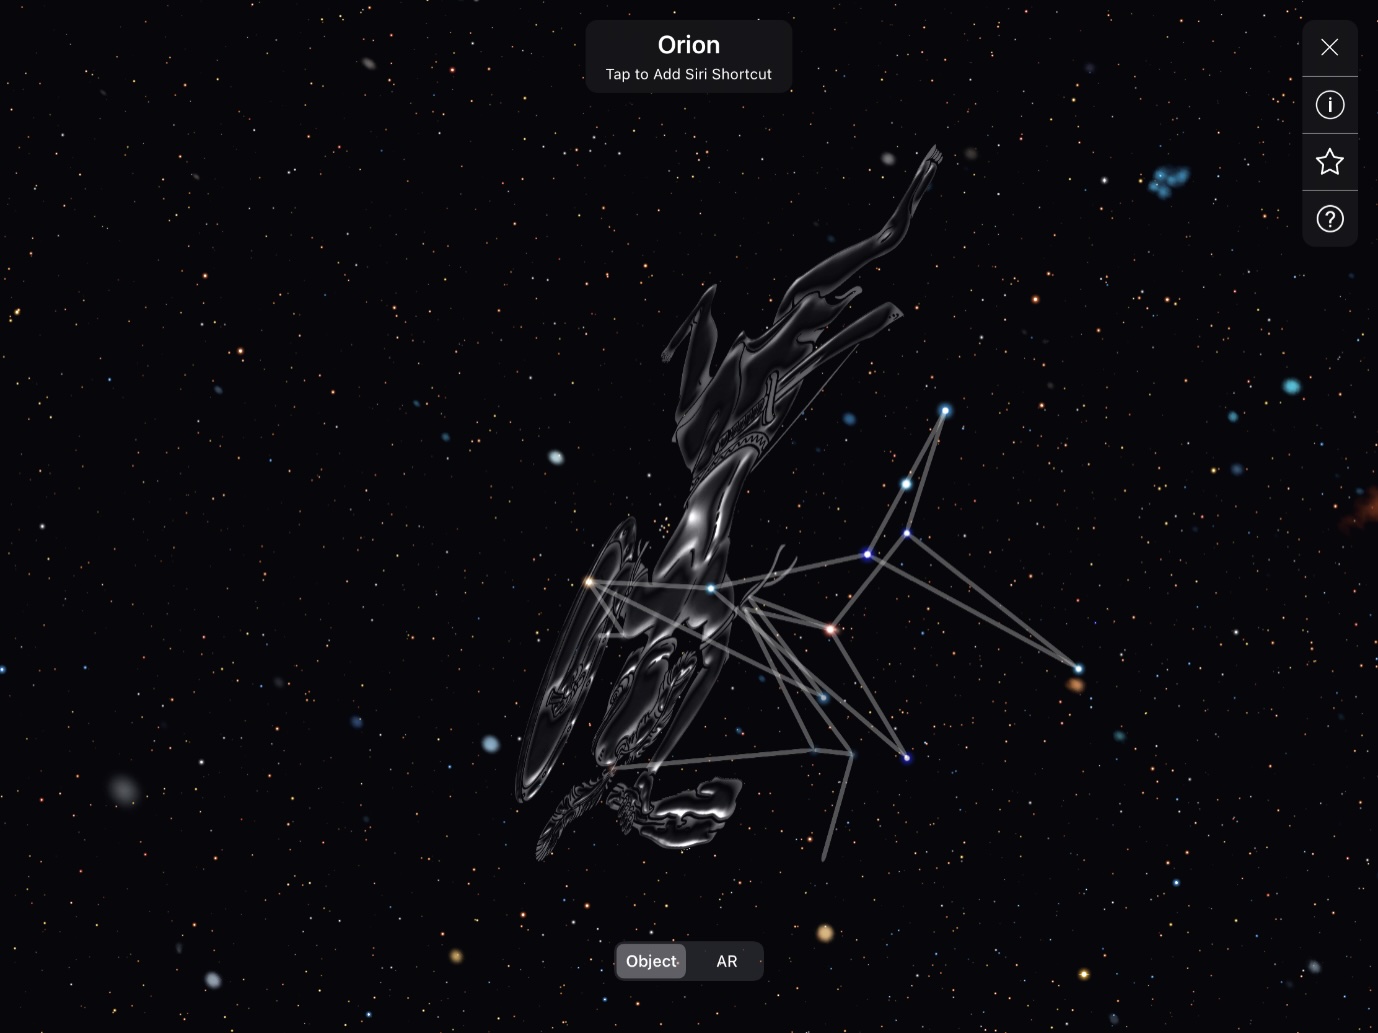
Double tapping on a constellation’s name brings up a three dimensional view of the constellation which you can rotate with your finger to see the stars’ relative distances. Tapping on the X in the corner will return to Sky View.
As well as the planets and stars, Sky View includes important and beautiful deep sky objects. These include nebulae, star clusters and galaxies. These are identified with their common names or their catalog designations. Night Sky includes every object in the Messier Catalogue and objects from the New General Catalogue (NGC) and Index Catalogue (IC).
Sky Tags
You can personalise Night Sky by labelling objects or features in Sky View with a coloured Sky Tag for future reference. Night Sky will remember your Tags and they will be displayed in Sky View and be included in Sky Tours. Night Sky’s Search function can find your Sky Tags too. You can also share Sky Tags for other Night Sky users to find with iMessage and other services.
Creating Sky Tags
Hold your finger where you want the Tag to appear and a slider will appear to allow you to select your preferred colour. When a colour has been selected a tile will appear.
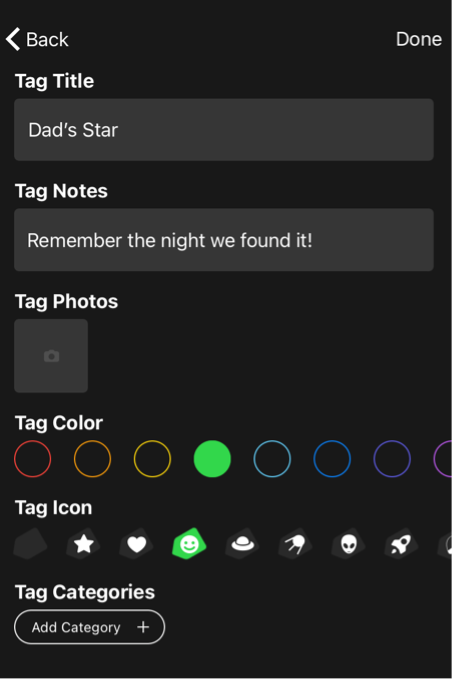
On this tile you can name the Tag and add notes (for example when you saw the star you are tagging, why it is important). You can link a photo to the Tag and edit the colour of the Tag. There is a range of Icons you can select for your Tag. Tags can be added to a category (Favorite, Memorials, Sightings, Observational Planning, Family or your own custom category). Select Done when you have finished creating your Tag. This will also offer you the option of adding the new Tag to your Notifications.
There is an alternative method to create Sky Tags by inputting the celestial coordinates of the object you wish to tag in the Sky Tags section of the Menu.
Using Sky Tags
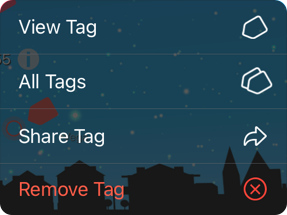
Tapping on an existing Sky Tag opens a tile giving you multiple options.
View Tag: Tapping on this opens a tile with the name of the Tag, its astronomical name (when available) and its coordinates. Tapping on the blue Directions button will bring the Tag to the centre of the Sky View.
All Tags: Tapping on this opens a tile with a list of all your Sky Tags.
Share Tag: This opens a tile with options to share the Tag with other Night Sky users by email, messaging or social media apps. Shared Sky Tags appear as links in emails, messages and social media posts. When the recipient taps on this link Night Sky opens and the Tag is added to the list of Sky Tags.
Remove Tag: This allows you to permanently remove a Sky Tag.
Night Sky users with Night Sky+ subscriptions can create an unlimited number of Sky Tags. Users of the free version of Night Sky are limited to two Sky tags.
Light Pollution Simulator (iPhone and iPad only)
Place two fingers anywhere in Sky View and move them up or down to increase or decrease star density. This will simulate different types of sky based on light pollution, from inner city skies to an excellent dark sky sites.
You can select alternative views with the buttons in the upper right of Sky View.
Night Sky Blending (iPhone and iPad only)
 Tap this button to access Night Sky Blending to merge the Sky View graphics with the real sky as seen by the camera on your device. The graphics and text help you to identify objects in the sky.
You are offered the option of adding the Sky View graphics to the scene from your device’s camera. This is ideal if you are using Night Sky outdoors. Alternatively, if you are using Night Sky indoors and a LIDAR scanner is installed on your device, tapping on this button offers the option to scan the ceiling. If you tap on the ceiling on screen Night Sky will intelligently “remove” the ceiling and replace it with a virtual window onto the Night Sky.
Tapping this symbol again returns to the simulated view.
Alignment tool (iPhone and iPad only)
 Tap on this button if Sky View is not correctly aligned with known compass directions or sky objects. You can then swipe left or right to fine align Sky View with the real sky. Tap on this button again when you are satisfied with the alignment.
Night Sky Compass (iPhone and iPad only)
 Use this button to shift to Night Sky Compass mode. This is a quick guide to what you will see in the sky through the night. You can move the time back and forward with the slider control along the bottom. How many hours (plus or minus) you are offset from current time is displayed in a pink box at upper left. The stars and planets around the compass move as the time is adjusted, so that you can see which bright stars are visible at specified times and in specific directions.
Dark Adaptation View (iPhone and iPad only)
 Use this button to shift to Dark Adaptation View. This makes Night Sky appear with a dim red backlight. Using this mode when you are observing the sky helps to maintain your eyes’ dark adaptation. This button only appears on Sky View after sunset for the current location.
Quick Preferences (iPhone and iPad only)
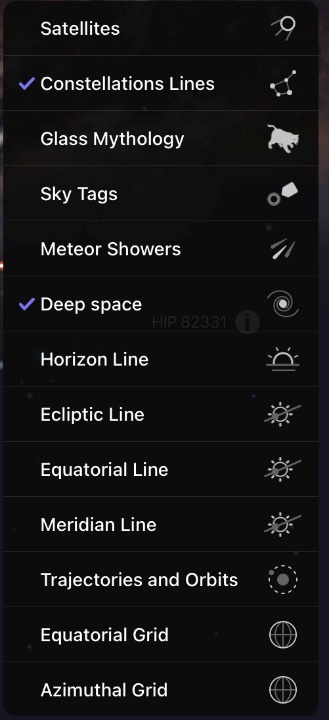
 Use this button to open a menu listing display options to quickly customise Sky View to present the data that is most important to you. Tapping on these will select or unselect options. These options can also be selected through the Preferences menu. See the Preferences section for detailed descriptions.
Light Spectrum Array (iPhone and iPad only)
 Sky View defaults to show you the sky as it appears to human eyes (optical view), but you can select a simulated sky background in other wavelengths by tapping on this button. You can cycle through the wavelengths by tapping repeatedly on this button.
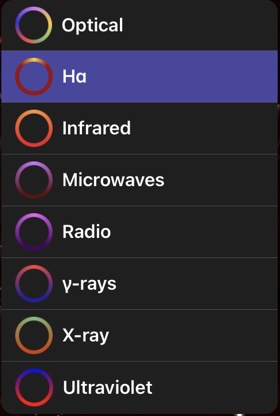
Alternately, by holding a finger on this button for a couple of seconds until a menu appears. Select a wavelength band from the menu by tapping on it.
The regions of the spectrum available in Night Sky are
- Optical (visible light)
- Hα (Hydrogen alpha: red light with a wavelength of 656.28nm)
- Infra red
- Microwaves
- Radio waves
- γ (gamma) rays X-rays
- Ultraviolet
Explore detailed sky backgrounds in every region of the spectrum.
 This indicator will appear in the bottom right of Sky View when an interesting Live Sky Event such as a meteor shower or planetary conjunction is underway. Touching this icon will open the Live Event tile.
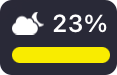 An estimated percentage of the current cloud cover at the Sky View location appears on this button. Touching this will take you to the Tonight In tile on the Menu Interface.
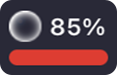 An estimated percentage of the light pollution at the Sky View location appears in the lower right corner. Touching this will take you to the Light Pollution tab on the Menu Interface (Night Sky+ feature).
Sky Objects
Touching many objects, such as planets and bright stars, in Sky View will display a link which will take you to a screen of additional information on the object (based on data from wikipedia.org). Buttons at the bottom allow you to access additional features. There are
 Find Object
 Add object to your Notifications
 Go to 3D Model (Moons, planets and satellites only)
 This is the Planetary Landing button. Use it to switch Sky View location to a point on a celestial object’s surface (Moon and Solar System planets and moons only)
 Share content with this button.
3D Models
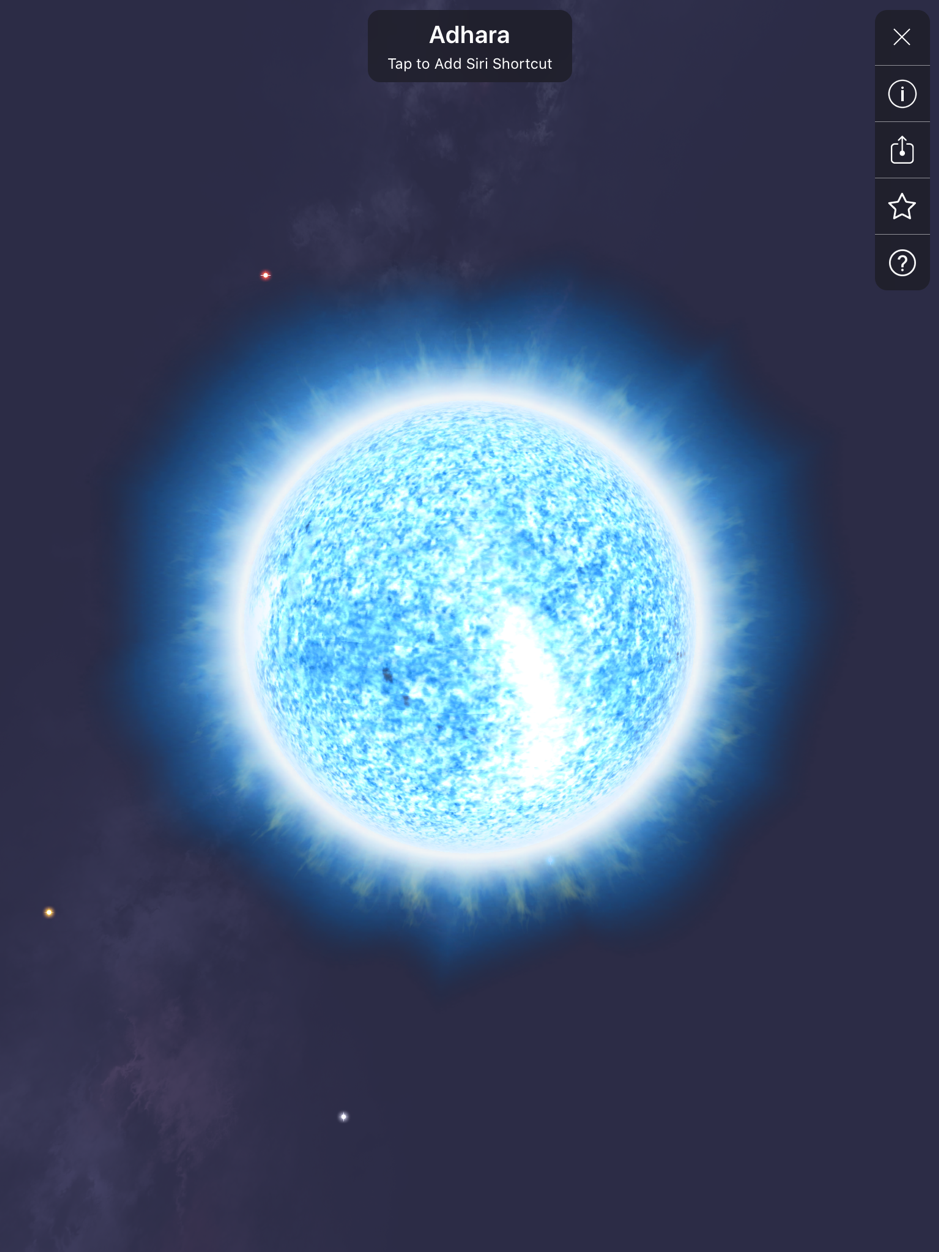
Many constellations, stars, planets and moons allow you to zoom into an Augmented Reality (AR) 3D model of the object.
 This button allows you close the model.
 This button allows you to view additional information on the modelled object.
 This button allows you to share the model via iMessage with USDZ.
 This button will add the rising time of the object over the horizon to your notifications.
 This is the Planetary Landing button. Use it to switch your Sky View location to a point on the object’s surface (Moon and planets only)
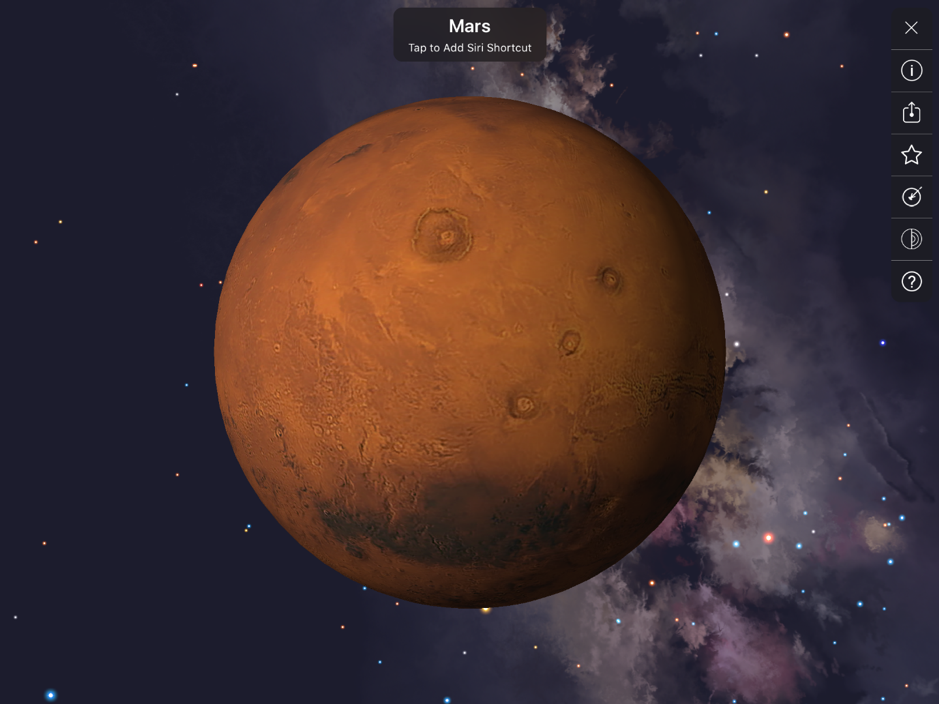
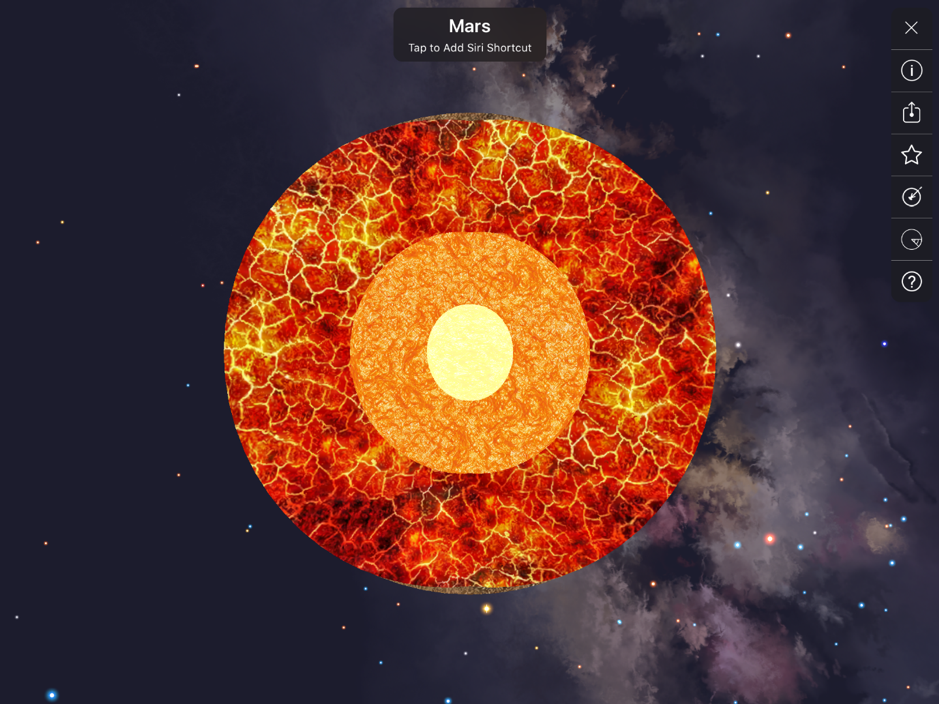

 Use these buttons to toggle between exterior and internal views of planets and moon. This reveals the details of the internal structure of the object.
 This button will open a tutorial on how to explore objects in AR.
With a double tap you can pull planets, stars, constellations and satellites out of the sky to examine in AR. Object exploration creates a 3D object centre for you to explore in more detail. You can add a Siri shortcut and share planets via iMessage with USDZ. When you finish you can throw the object back into the Night Sky.
Tapping on a planet, dwarf planet or moon will also switch your Sky View location to a point on its surface. You can return to your location on Earth by tapping on the purple band at the top of your screen.
Menu Interface
Menu Interface
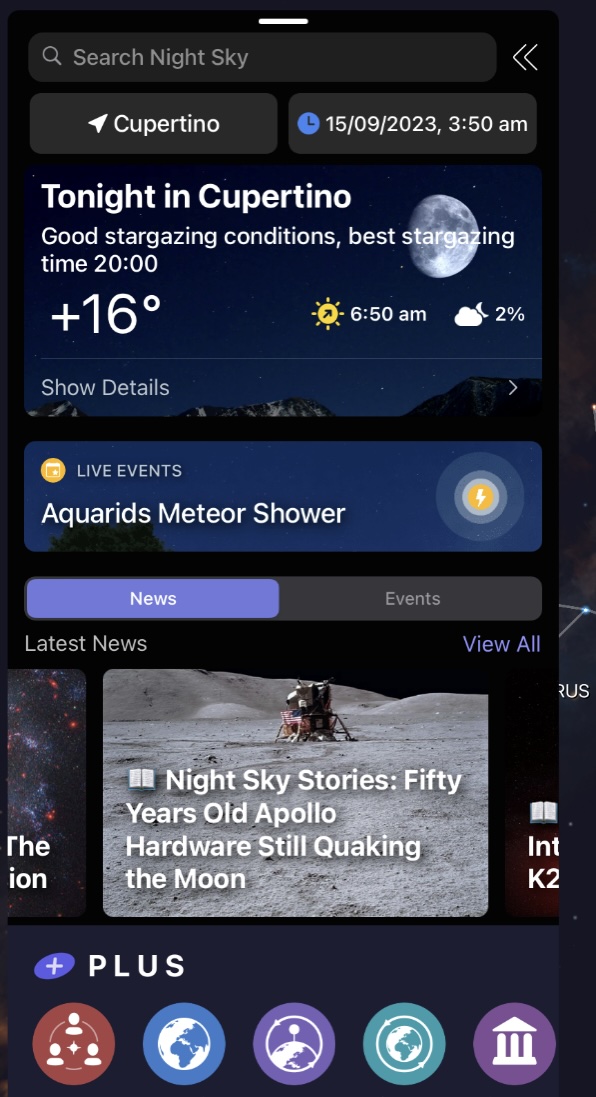
You can expand the Menu Interface to the height of your screen by pulling down on the tab at the bottom. This will reveal more tiles and buttons.
Editing the Main Menu
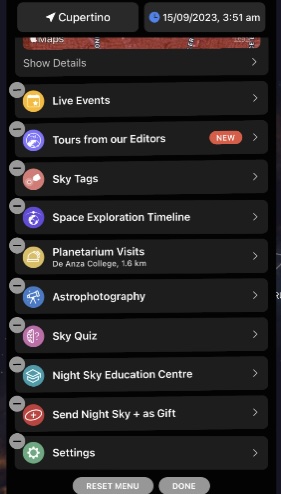
The Menu can be customised to suit your preferences. To do this either tap on the Edit button at the bottom of the Menu or touch and hold any Menu item until the items begin to jiggle. An item can be deleted by tapping on the Minus in its top left corner or dragged to another location in the Menu. Tapping on Reset Menu returns the Menu to its default layout.
When you have finished making changes, press the Done button.
Search bar
Type in the name of an object and Night Sky will display all the Night Sky features related to it. Night Sky can recognise some commonly used but unofficial names such as ‘the Big Dipper’ and ‘the Plough’. When a user searches for these commonly used names, Night Sky will display the correct objects in the search results. Night Sky’s database includes your Sky Tags, Solar System planets, dwarf planets plus the major Solar System moons, many comets, Earth satellites and rocket bodies. The database also includes constellations, stars, Messier Objects and selected deep sky objects including objects listed in the New General Catalogue (NGC) and Index Catalogue (IC). Each object has a concise description. Search results will suggest any available Night Sky options for the object. These options can include Show Directions, View in AR, Show 3D View and more.
You can narrow your search by tapping on categories to deselect them. The categories include Constellations, Stars, Planets and Dwarf Planets.
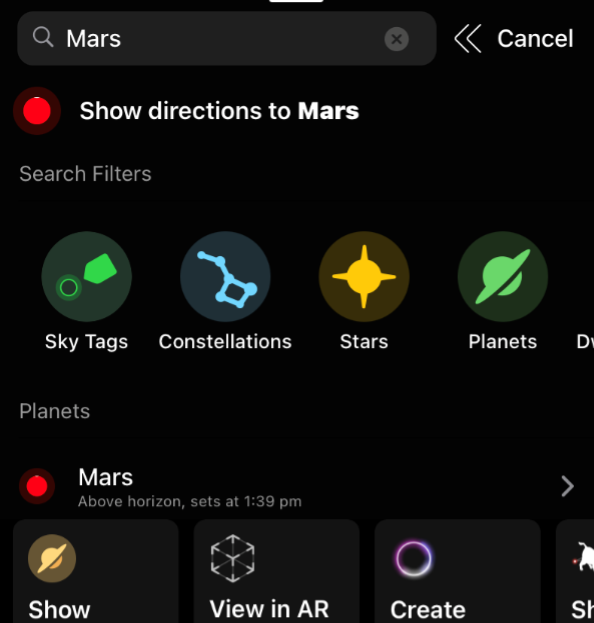

You can use this button to take you to the object in Sky View.
 Objects that you will repeatedly wish to examine can be added to a Quick Find list by touching this button. To delete an object from your Quick Find list touch and hold it until a Minus symbol appears. Tapping on this will remove the object from Quick Find.
Spatial Audio Object Detection
AirPods Pro or AirPods Max users will receive audio cues to add an extra layer of immersion to the space navigation experience. These ”chirps” can guide users through a 360° soundscape to the object.
To use Spatial Audio Object Detection, automatic sky tracking and the device’s compass must be functional.
World Traveller Tile

Your current location is displayed here. Clicking on this lets you manually change the location.
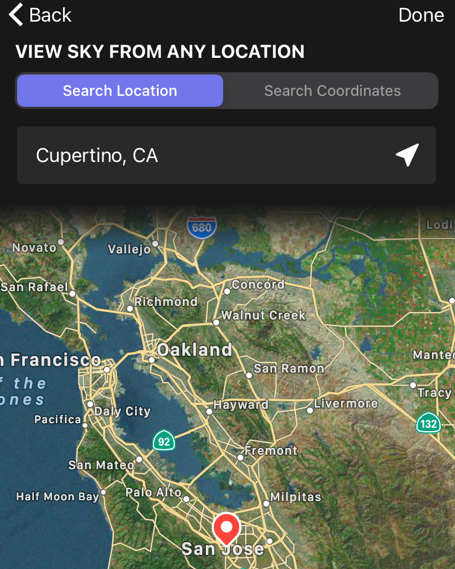
You can pick a viewing location from the map, find a viewing location with the search box or enter the latitude and longitude of the viewing location. Note that Night Sky will not use the viewing location you have selected as your actual location. You will continue to receive notifications and alerts for your actual location.
Space Travel Tile

Your current date and local time are displayed here. The app presents the time in the format (am/pm or 24 hour) you have selected in your device’s settings.
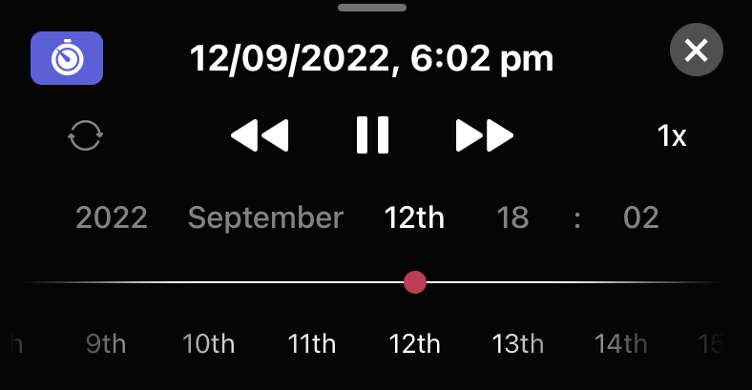
Clicking on this tile opens an interface allowing you to change the viewing time and date. On an iPhone or iPad you can swipe across dates or times with a finger, on a Mac you do this by clicking on a date or time and dragging it across the screen. The Night Sky View will change to reflect the changes. You can move the view forward and back in time. This allows you, for example, to plan stargazing sessions for the evening ahead or look back to identify a planet you observed the week before.
Sky Timestamps
 Use this button to easily save a time in the past or future as a Sky Timestamp. Saving dates and times as Timestamps allows the user to quickly and easily return to them. Users can save the sky as it appeared on significant birthdays or any other special dates.
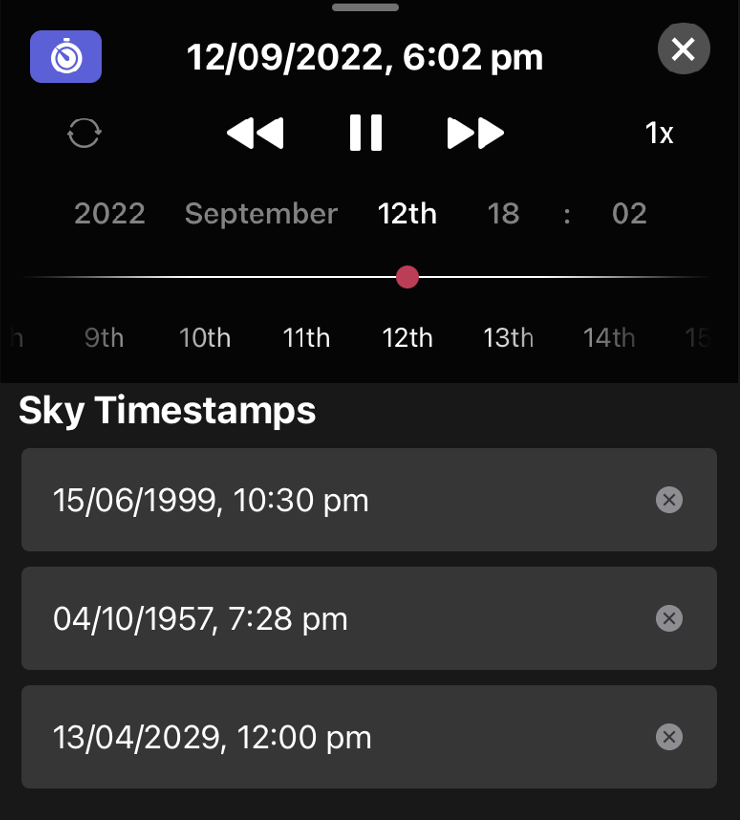
Saved Sky Timestamps are listed in the Space Travel tile. Tap on a timestamp will set Sky View to the saved time.
Tonight Tile
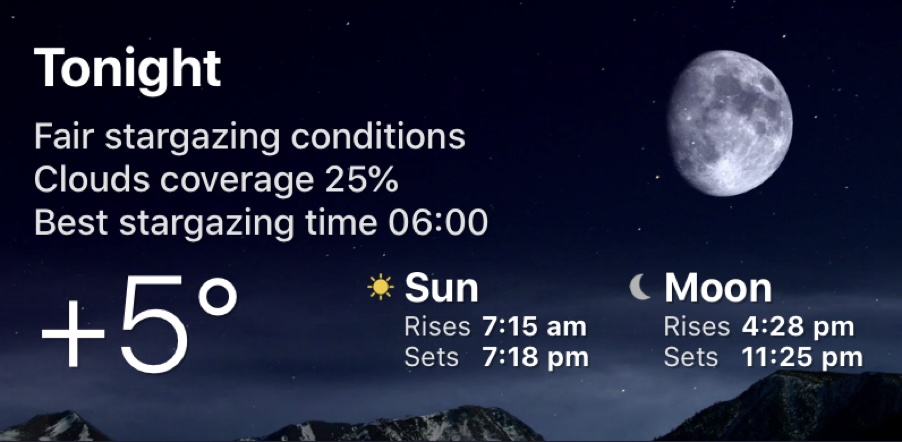
This displays the projected stargazing conditions for the forthcoming evening and an estimate of the best time for stargazing along with the current temperature and setting times of the Sun and Moon at your location.
Touching this tile shows you more details.
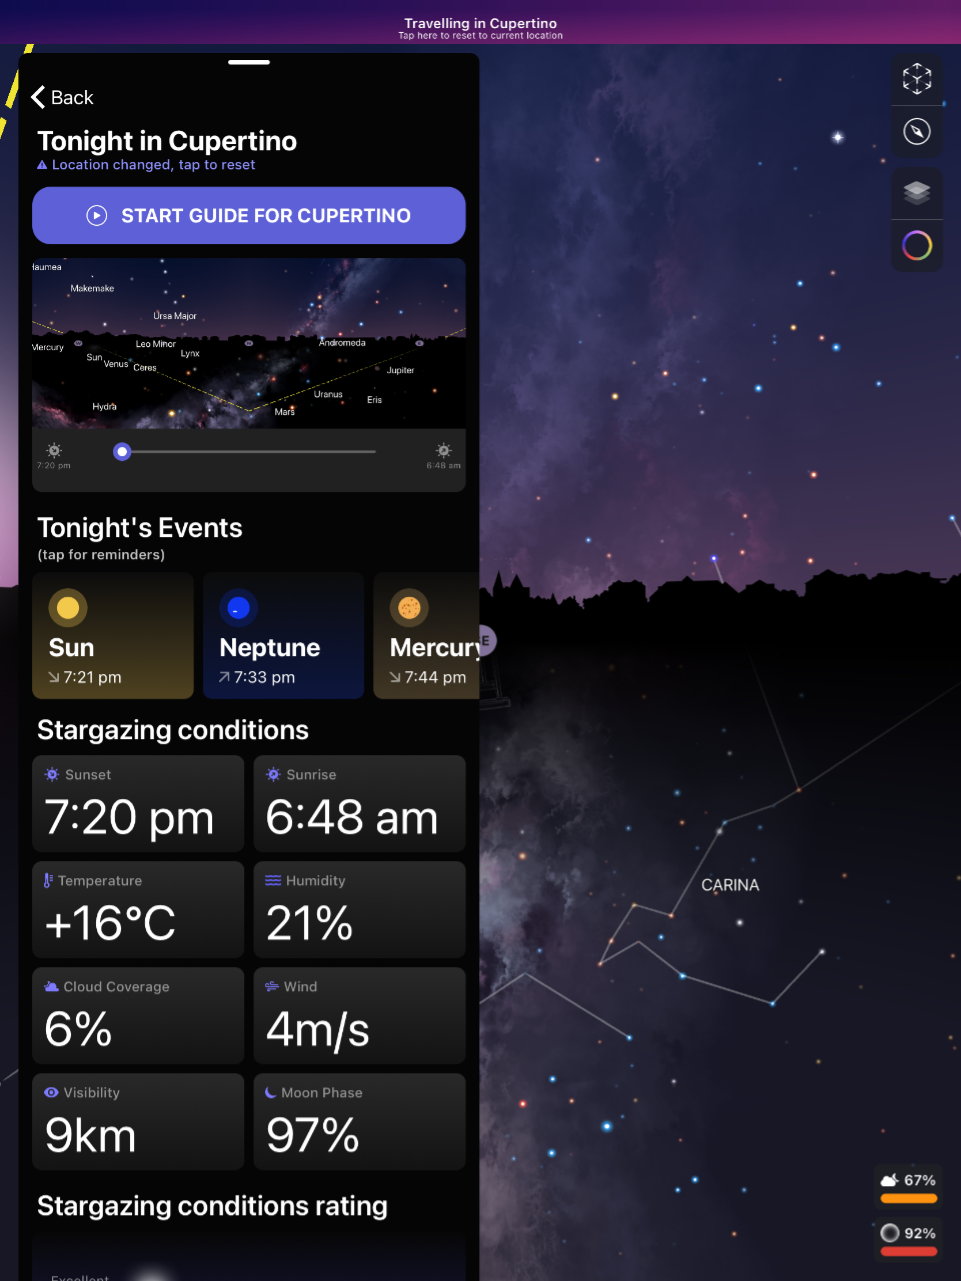
These include:
• Estimates of the current cloud coverage, visibility, wind speed, humidity and temperature at your location.
• All planets which can be observed (with the unaided eye or telescopes) from your location with their rising and setting times. The Sun and Moon are also included on this list.
• A table of useful current stargazing conditions for your location.
• A graph displaying your location’s predicted stargazing conditions rating across the hours of darkness for the night ahead. The predicted meteorological conditions are estimates based on local data.
• The time of the International Space Station’s next flyover for your location along with its current crew roster.
• The time the next string of Starlink satellites will be visible from your location.
• A table of your location’s predicted stargazing conditions for the next six days.
• A graph of your location’s predicted stargazing conditions for the next six days.
Feature Discovery Tile
The intelligent Feature Discovery Tile previews one of the Night Sky’s features. When a Night Sky appeals to you, tap on this tile to go straight to it.
 Connected Stargazing – Night Sky+ For iPhone/iPad and Mac Only
This feature uses SharePlay to allow you to stargaze with friends and family when you are physically apart.
The session host sets up a Connected Stargazing session during a FaceTime call. Alternatively, the host can set up the session before the call starts and save it to run during the FaceTime call. Users with iPhones are recommended to use FaceTime Audio as the Picture in Picture obscures part of Sky View.
When the session starts other users in the call are automatically notified that the host has started a SharePlay experience in Night Sky. Users tap a prompt at the top of screen to join the session.
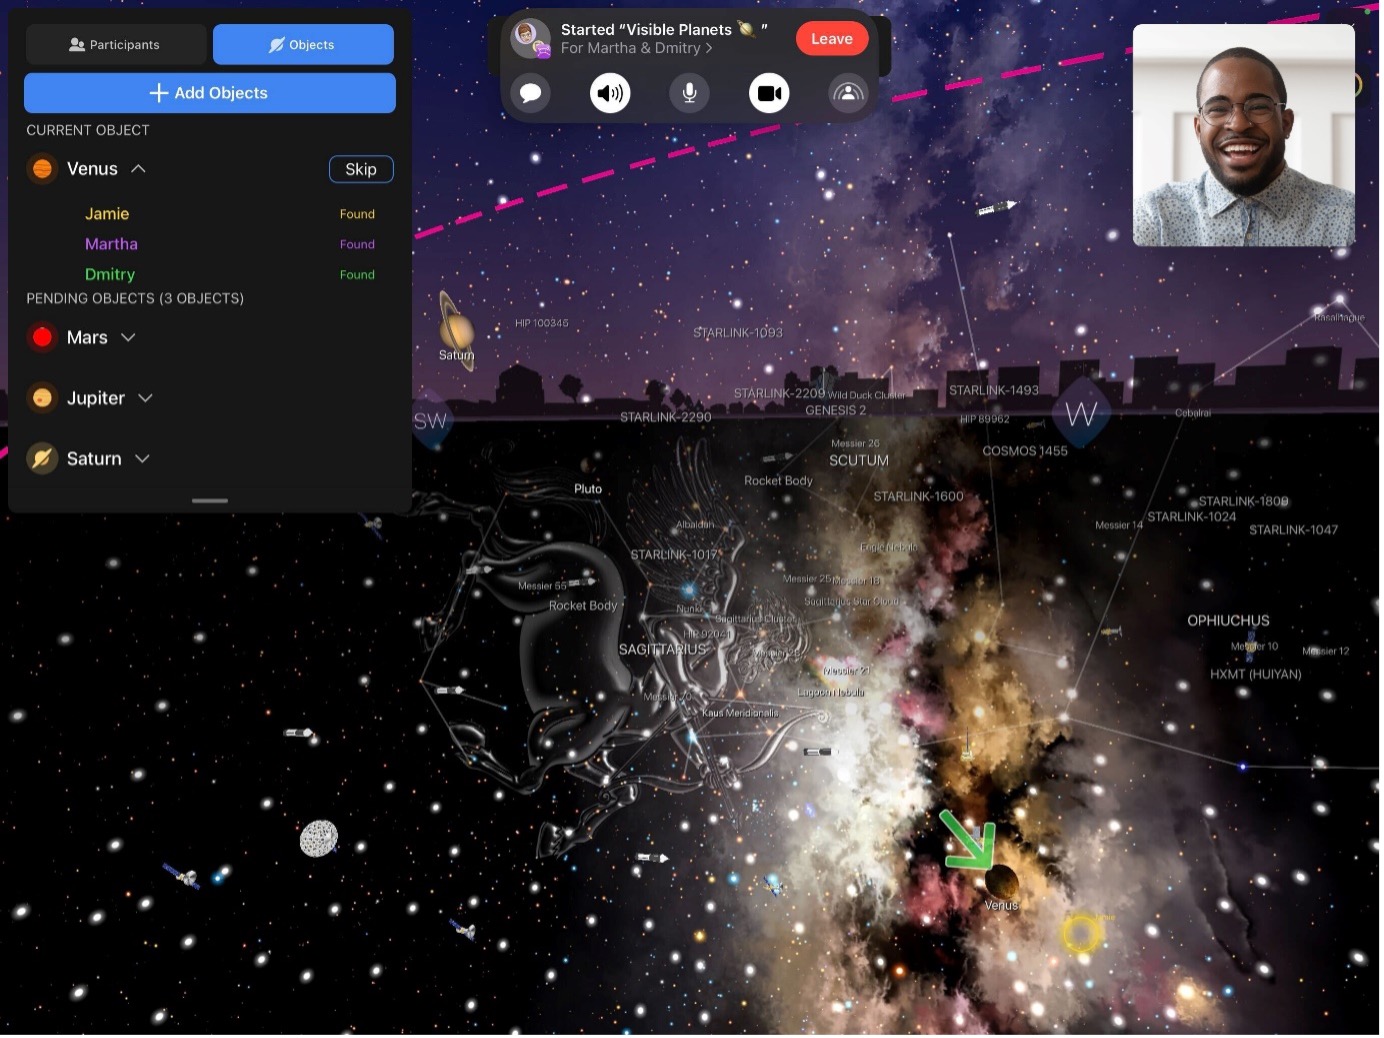
The host and the other participants can collaborate in adding stars, planets and other objects to find with the Add Objects button. Colored circles in Sky View appear to show where each participant’s device is pointing. As objects are found other participants will see updates appearing as notifications on screen.
Once all the objects have been found there will be a summary of the objects found and the participants can choose to leave the session or more objects can be added to be found.
To use Connected Stargazing, all participants need a compatible installation of Night Sky. Keep the app updated and check the technical requirements in Installation and setup.
 Earth Live Satellites – Night Sky+ only
This brings up a 3D model of the Earth. The current positions of Earth satellites and rocket bodies are displayed around it (if Show Satellites has been selected in the Preferences). If Show Satellites has not been selected in the Preferences only the 3D Earth model will be shown.
 My Tours – Night Sky+ only
Selecting this tile allows you to design a Night Sky Tour in Sky View for a time and location of your choice. You can pick a location from a map or find a location by using the search bar. Once you have selected a location you will be invited to use either the current date or a custom date.
During a tour you will be prompted to move your device to follow an arrow to find a series of objects in Sky View or in the sky in AR mode.
The tour will show you notable objects visible in the sky at that location including the time they rise over the horizon. If you are going to be travelling, you can use this to plan what you will see there.
Completed tours are stored for you to replay. Stored tours can be deleted by holding their tiles until an X appears in the corner, pressing this will permanently delete the tour.
You can create your own personal Tours to view yourself or share with others. To create a Tour, tap on Custom and then tap on the + button in the top right. You will be invited to add the content displayed at the start of your Tour. These are a cover image (you can take a photo or use an image from your Library) and a title for your tour. You can also add an optional description of what your Tour is about.
To add events to your Tour tap on  The two types of event are Locate Object and Show info.
Locate Object allows to you to add directions to any object included in Night Sky’s database (including Sky Tags you have already created) to your Tour.
Show info is used to add a screen with a narration, an image and text to your Tour. Enter the text to be narrated into the Event Text box. Add the image you would like to be displayed from your camera or Library. Enter any text you would like to be displayed on the image in the Event image text box.
As you add events they will appear in a list which will be in the order of events in your Tour. You can reorder an event in the list by touching and holding  , when you do this you can drag the event to a new position in the list.
To edit or delete an event, touch it and swipe it to the left. An Edit button and a Delete button will appear.
When you have added your events tap on Save. Your Tour will appear in a list under My Tours. To edit or delete a Tour, touch it and drag it to the left. An Edit button and a Delete button will appear.
All Tours can be shared with other Night Sky users with the Share button. Shared Tours appear as links in emails, messages and social media posts. When the recipient taps on this link Night Sky opens and the Tour is added to the list of Tours. When you share an object from Night Sky to another compatible device they will appear on the Shared with You shelf on the Main Menu.
 Live Sky Tour – Night Sky+ For iPhone/iPad and Apple Watch Only
Selecting this allows you to pick a Night Sky Tour in Sky View based on your current time and location. A short tour will show you the major constellations and planets, a medium tour will show more constellations plus the International Space Station and the long tour will point out bright stars in the constellations as well.
 Night Sky Museum- Night Sky+ for iPhone/iPad Only
Tapping on this icon opens our augmented reality Museum of significant objects, artefacts and vehicles from the history of astronomy and space science. Tapping on each object brings up a short article explaining its significance and a blue button to tap to bring a 3D model of the subject into your environment for you to explore.
 AR Grand Orrey – Night Sky+ for iPhone/iPad only
An orrery is a scale model of the Solar System to illustrate the relative positions and motions of the planets.
This tile lets you access Night Sky’s Grand Orrey. Night Sky includes an augmented reality orrey which you can bring into your home, classroom or office to simulate the positions of the Moon, planets and other Solar System features.
This feature is explained in its own section of the guide.
 AR Planetary Portals – Night Sky+ for iPhone/iPad only
This tile lets you step onto the surface of other planets by placing augmented reality (AR) portals around your room.
This feature is explained in its own section of the guide.
 Aurora Forecast – Night Sky+ only
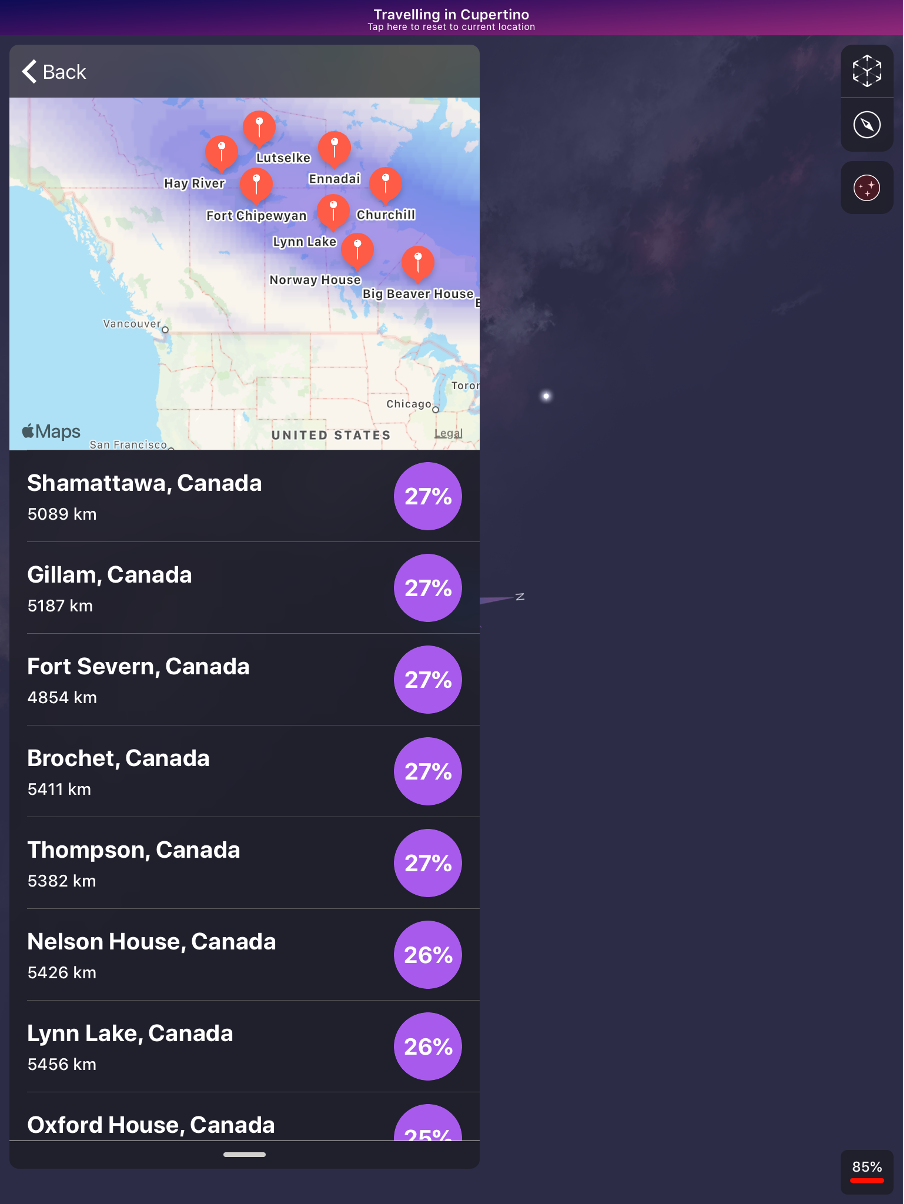
An aurora is a natural light display in the sky caused by particles ejected from the Sun interacting with the Earth’s upper atmosphere. They are mostly visible in northerly and southerly regions around the Arctic and Antarctic.
Touching this tile will display a map showing your location with the closest area where an auroral display may be visible in the next 24 hours indicated in purple. The closest population centres in this
area to your location are listed below the map with their distance and estimated percentage chance of an aurora being visible. Note that aurora are very unpredictable phenomena and their visibility can be limited by the local weather so aurorae may not become visible in the indicated area.
 Moon Tours – Mac only
Tapping this button takes you to a menu where you can select narrated tours of accurately simulated 3D locations on the Moon. There are three tours to choose from:
• Apollo 11: Tour the location where humans first landed on the Moon.
• Apollo 15: Tour a site where humans landed on the Moon in 1971.
• Copernicus Crater: This is a 3D simulation of a famous location on the Moon.
 Night Sky Mindfulness – Night Sky+ for iPhone/iPad only
Mindfulness is a relaxation technique where you concentrate on your mind, body and breathing.
This tile takes you to a menu where you can select a mindfulness breathing session of your preferred duration. The Mindfulness session takes you to Sky View (with interactivity disabled). You will be invited to follow a breathing cue with a gentle musical accompaniment. Your Mindfulness Minutes can be shared to Apple Health with quick access to the wind down shortcut.
Light Pollution – Night Sky+ Only
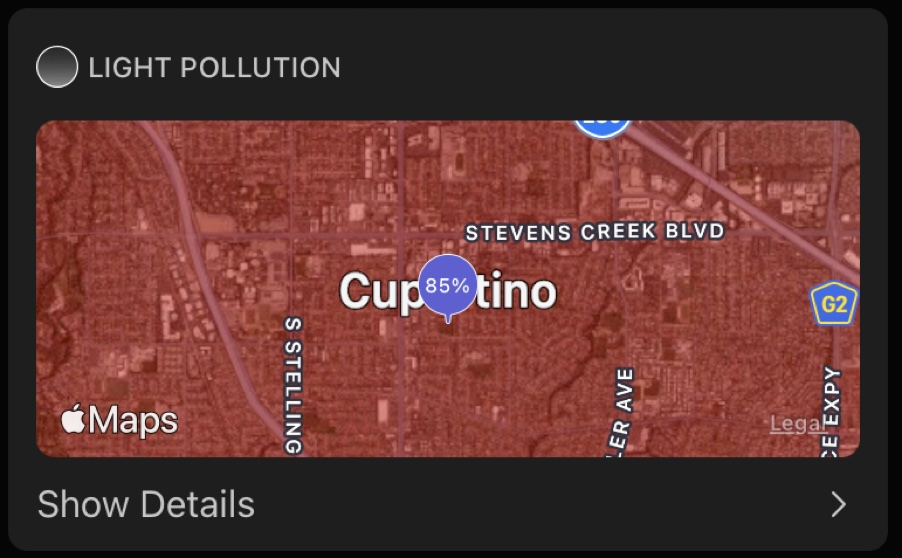
Light pollution is the presence of human-made artificial light in the night environment. Excessive light pollution can limit your ability to see dimmer objects in the night-time sky.
Touching this tile will display a map showing your location with superimposed colour-coding indicating how severe the light pollution is estimated to be in your region. Your location is identified under the map.
If you are at a site with low light pollution you can share its location with the astronomical community by touching the white marker tag under the map.
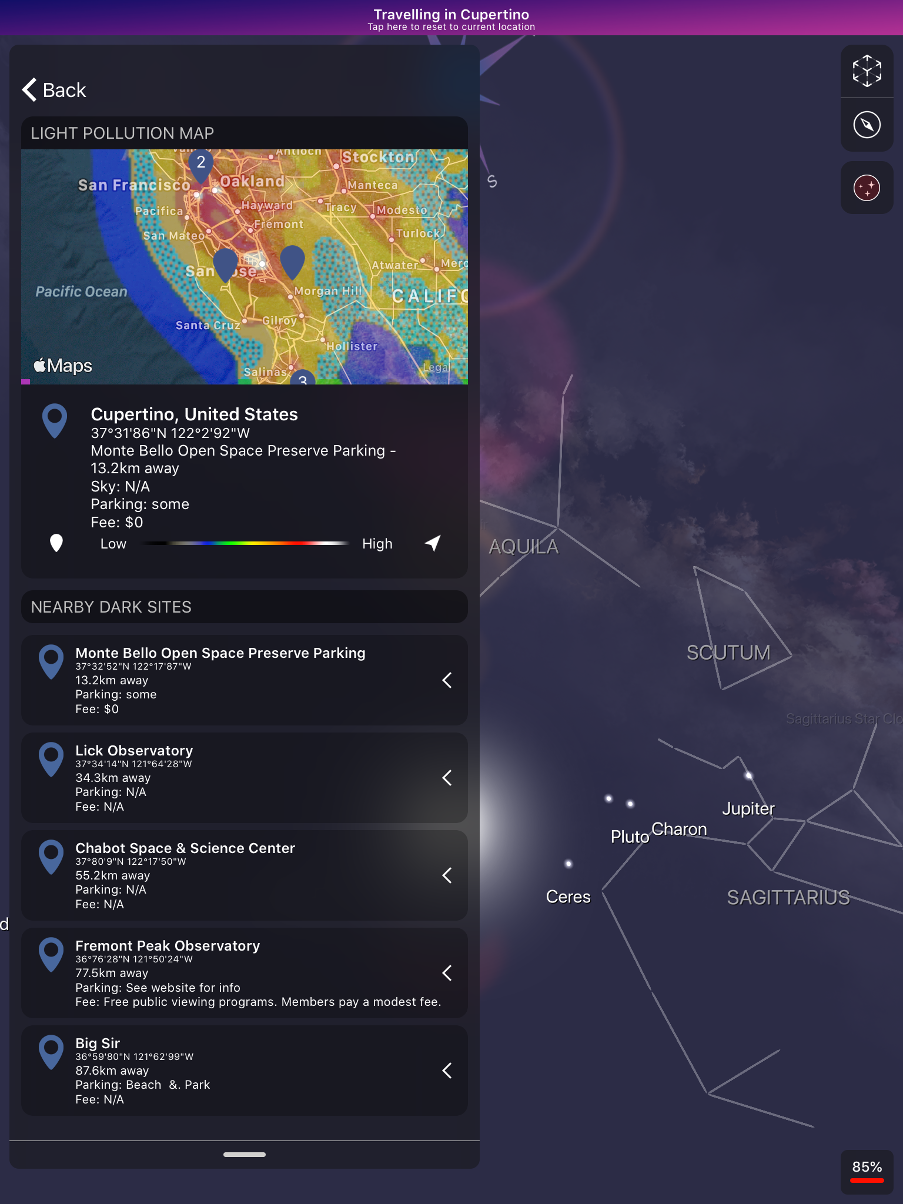
The closest official Dark Sky site, along with its distance from your location and other details, is identified under your location. More of the closest dark sky locations are listed on tabs below this. Sliding a site’s tab to the side allows you to access more information about the site and to get travel directions to the site. Note that this will exit Night Sky and take you to a mapping app on your device.
News
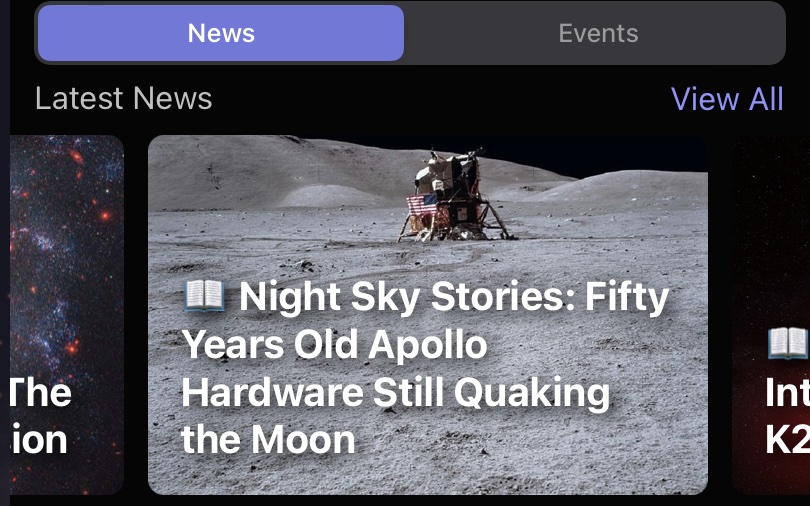
This tile takes you to our news section. Selecting a tile in the Night Sky News area takes to you a fascinating news story or feature from the exciting worlds of space and astronomy. You can find out more about what’s in the sky tonight, discover stories from space history and even catch breaking news. Many stories have links to take you to celestial objects in Sky View or to add upcoming space events to your device’s Calendar.
You can also email the story’s author to ask your own Night Sky questions. There is a button to allow you to share the story by many ways including email, Messenger and social media too.
Events
Clicking on a tile in this selection takes you to a menu of upcoming Night Sky events, including links to take you to the events’ celestial objects in Sky View or to add events to your device’s Calendar.
Live Events
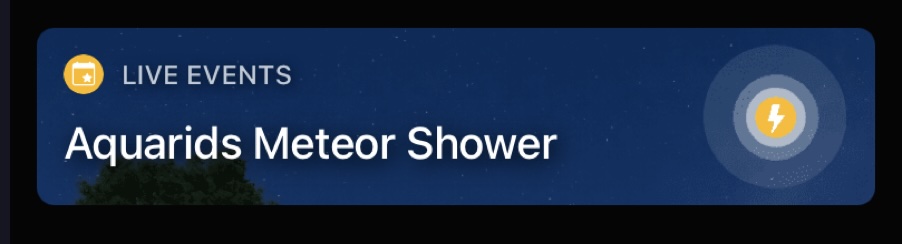
Live Events are current astronomical events visible in the sky. The Live Event will also be highlighted in Sky View while it is active. Tapping on this when there is an active Live Sky Event opens a new tile.
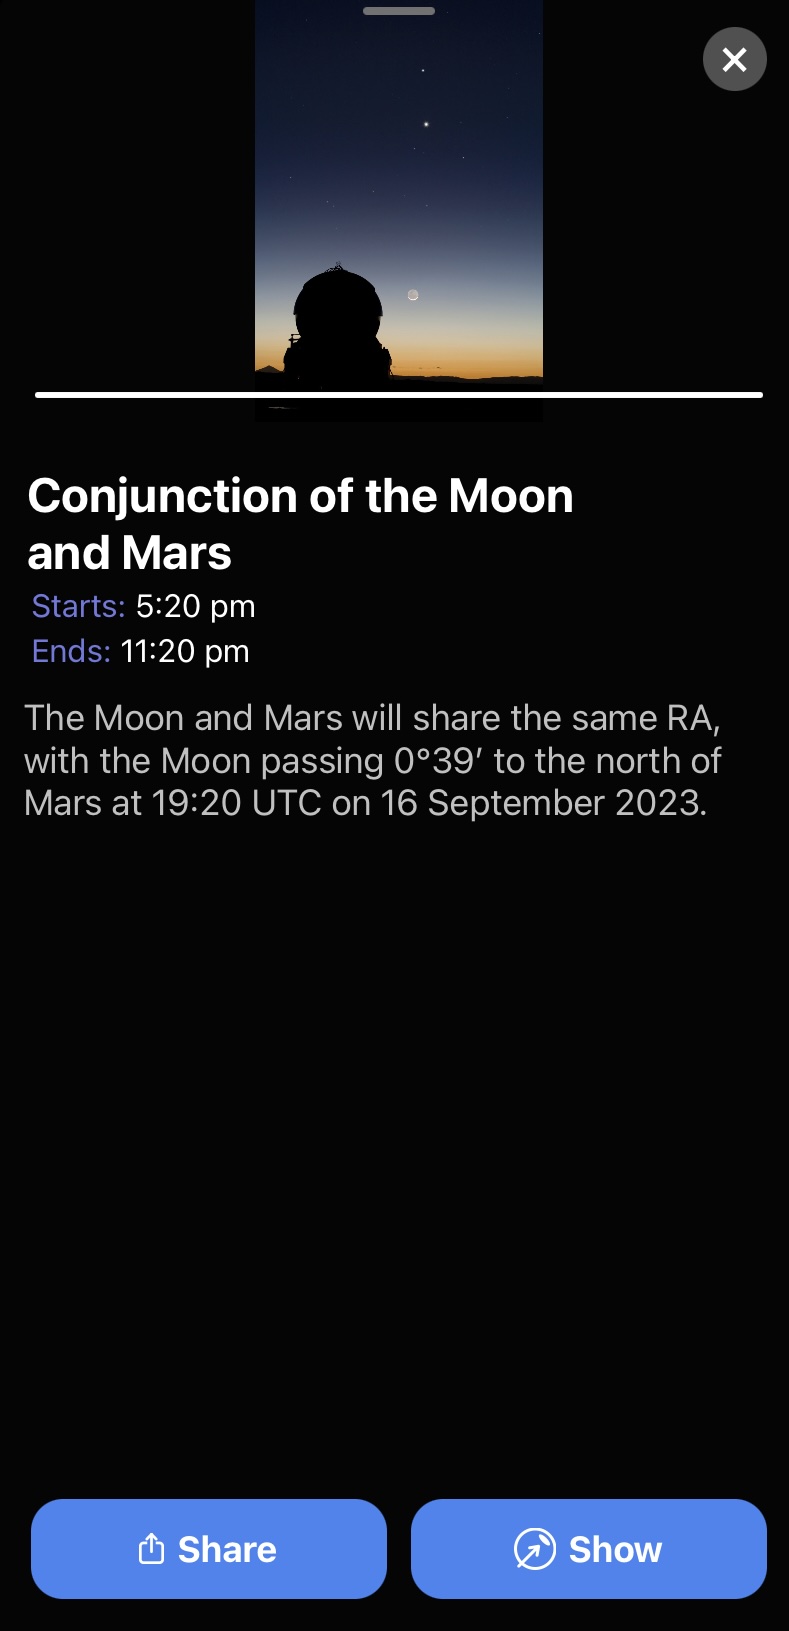
This tile displays the event’s details. There are also buttons you can use to Share the event by email or social media or to directly Show you the Event in Sky View. Use this feature to find the most exciting celestial wonders to view as soon as you launch Night Sky.
Tours from our Editors
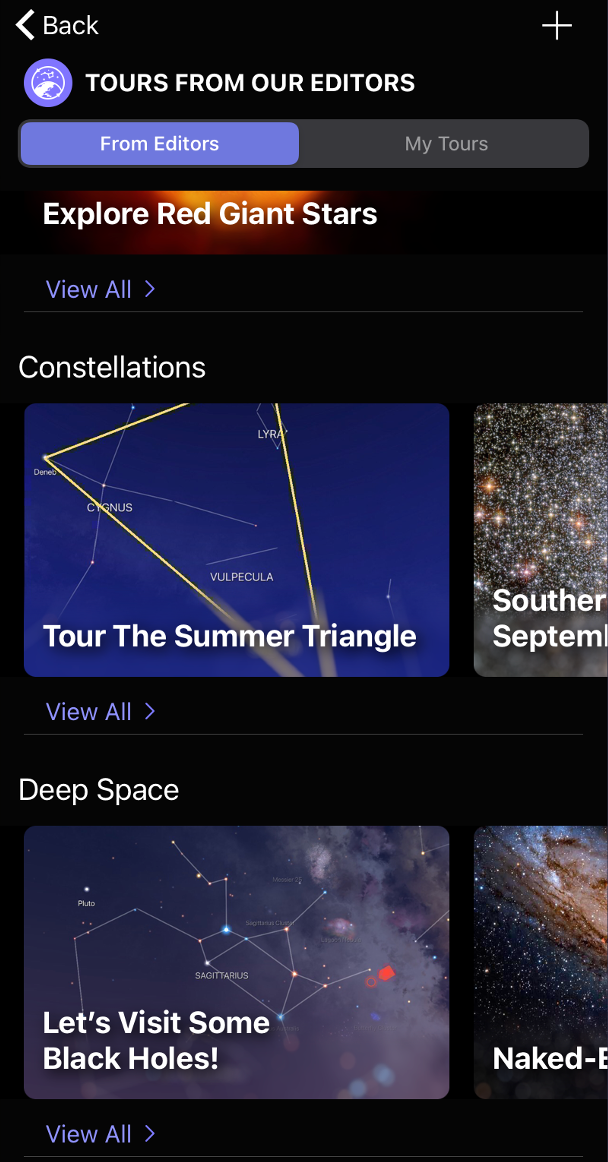
Clicking on this tile presents a list of short narrated tours designed by our team of editors. These are categorised by subject. Swipe left or right to see more Tours in each category. Tapping on a Tour opens a tile with a description of the Tour and a play button. A Tour can be dismissed or ended by tapping on the X in the top right corner. New Tours are added every few days.
Sky Tags
Tapping on this opens the Sky Tags menu. Note that Show Sky Tags must be selected in Preferences to use this feature.
Create Sky Tag
Tapping on this allows to you to create a new Sky Tag anywhere in the sky. This feature is useful if, for example, you know the co-ordinates of a celestial object but cannot locate it. You can name the Tag with Tag Title, then tap on Tag Location to enter its celestial coordinates. Night Sky uses the standard equatorial coordinate system where an object’s right ascension and declination define its position. Once you have selected the colour for your new Tag, tap on Create Sky Tag to complete the process. New Sky Tags appear at the bottom of the list of your Sky Tags.
Show Sky Tags control
Turning off this control will hide all Sky Tags in Sky View.
Sky Tags List
This list shows all the Sky Tags you have created or have had shared with you in order of creation (oldest first). The row of colour buttons allows you to select which colour (or colours of Tags) you wish to be selected. You can pick which categories you wish to see in the list with the row of category buttons.
Tapping on a Sky Tag brings up its details. These are the name of the Tag, its astronomical name (when available) and its coordinates. Tapping on the blue Directions button will bring the Tag to the centre of the Sky View.
You can remove a Sky Tag from the list by swiping left on the Tag. This permanently deletes the Tag.
Space Exploration Timeline
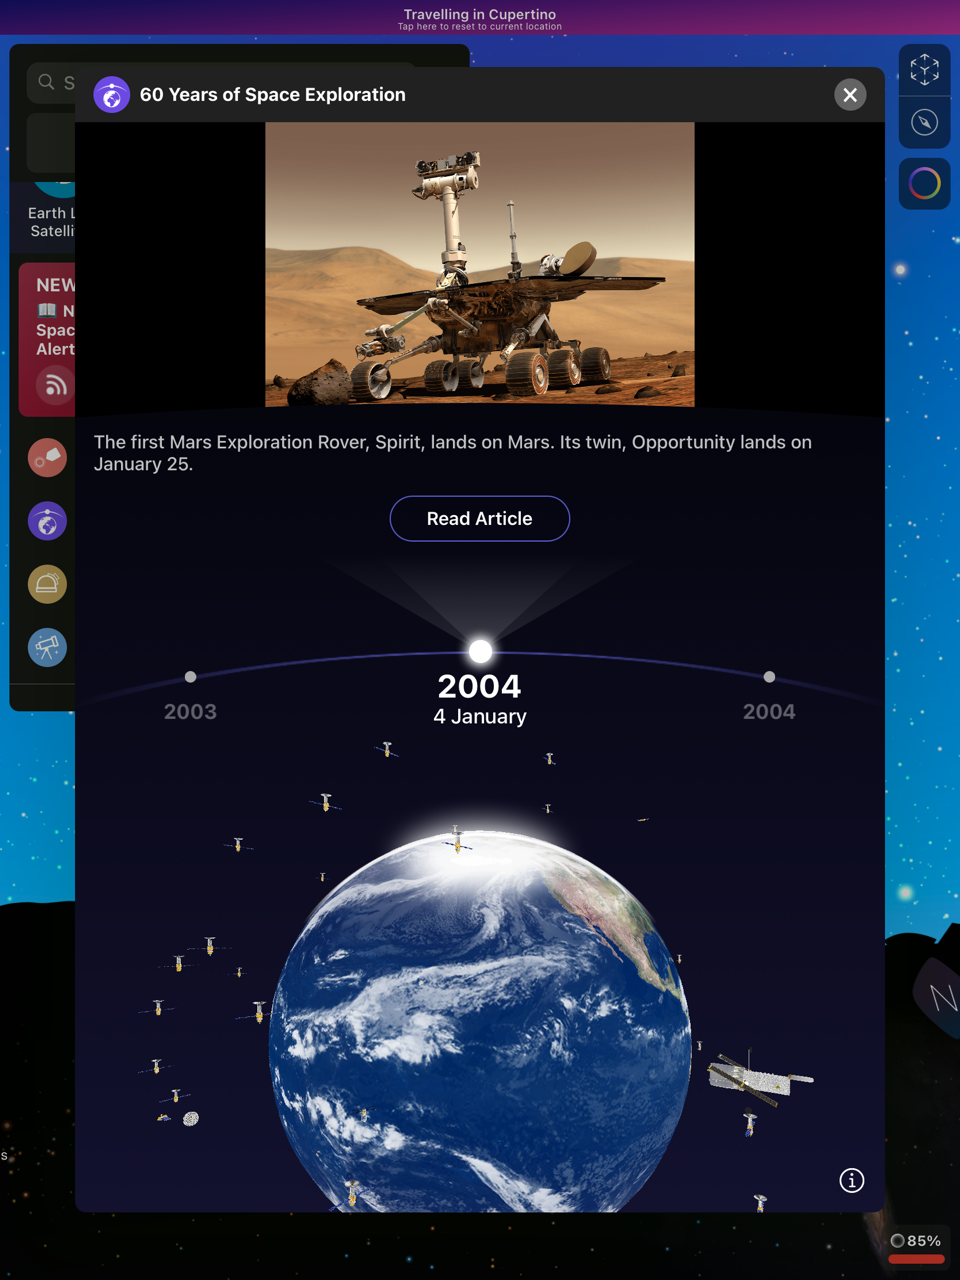
Tapping on this tile opens an illustrated tour of highlights in the history of space exploration from 1960 onwards. Swiping along the timeline (click on the edge of the timeline to do this on a Mac) will display the dates and brief details of key space launches and missions starting with Yuri Gagarin’s historic flight. To find out more you can tap on the Read Article button (in some instances this button will link to a third party site, iCandi Apps is not responsible for the content on any third party sites). As you advance the timeline, the number of satellites orbiting the Earth globe will increase.
Planetarium Visits
A planetarium is a science education facility where simulated night skies are projected on a domed ceiling.
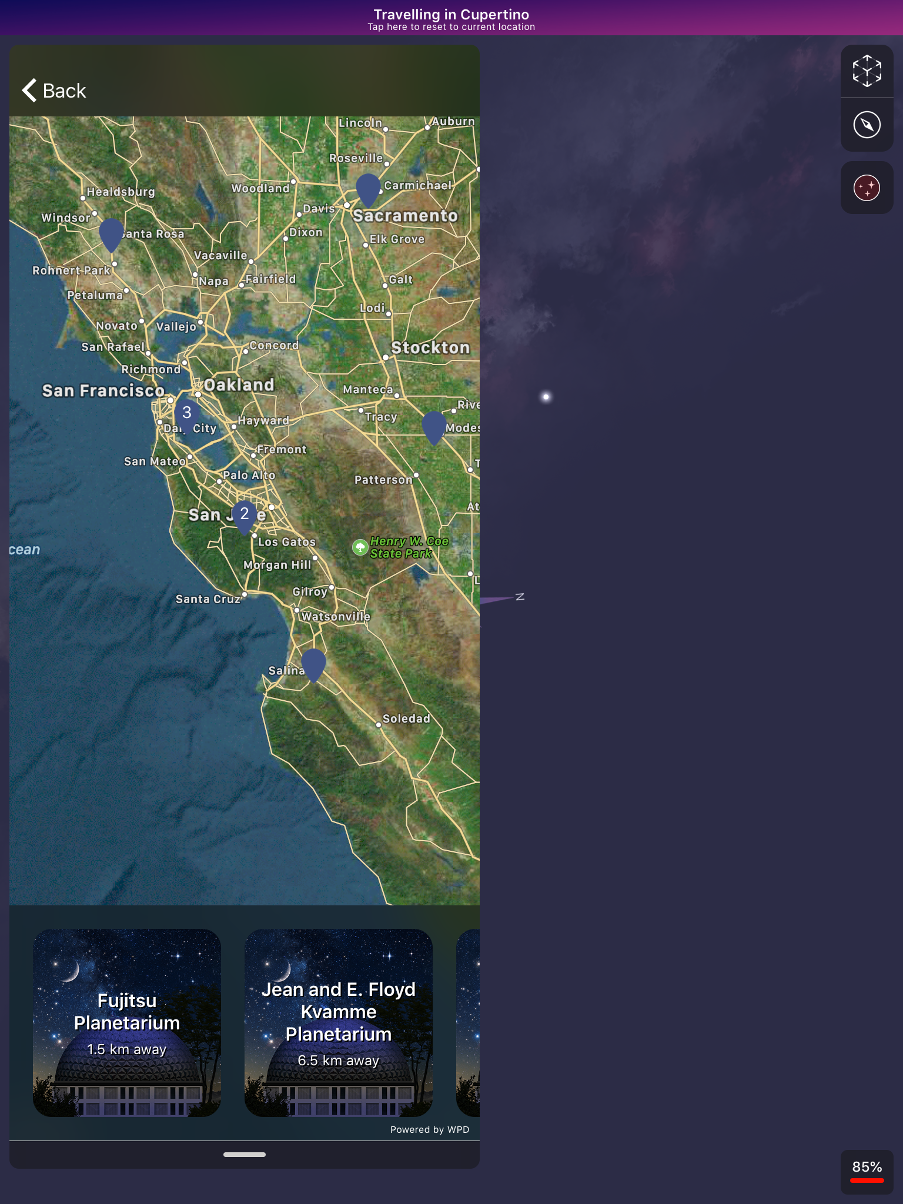
Touching this tile displays the closest planetariums, public observatories and space science museums to your location with their distances from your location.
Touching the tile brings up a map showing the locations of the planetariums. Touching the information button on the location tag takes you to each planetarium’s entry in the World Planetarium database (iCandi Apps is not responsible for the content on any third party sites). Return to the Menu by touching the Done button.
Astrophotography (iPhone and iPad only)
Making images of the sky and celestial objects with a camera is called Astrophotography.
Touching this tile lets you access Night Sky’s powerful astrophotography tools to image the sky with the camera on your iPhone or iPad. These tools are explained in their own section of this guide.
Sky Quiz
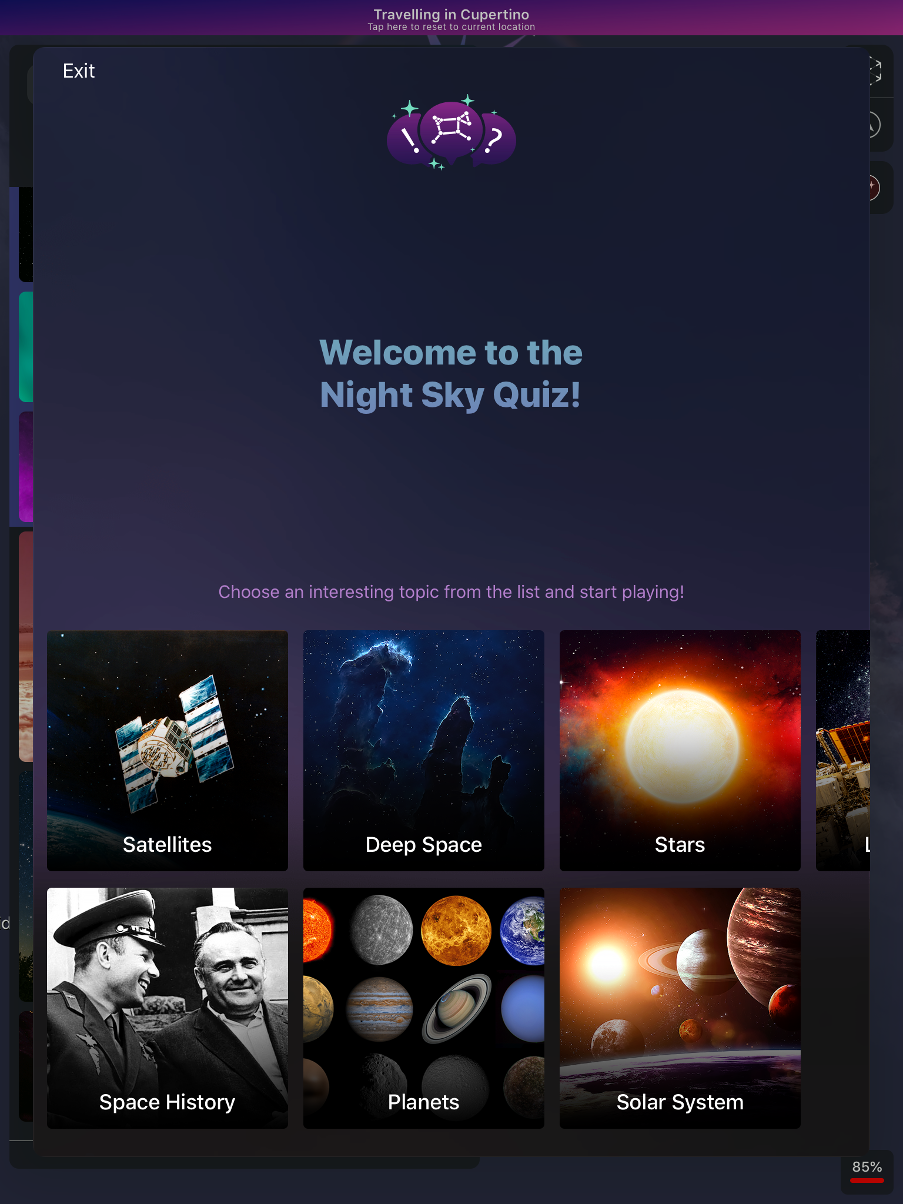
This tile opens a menu where you can choose a fun multiple choice quiz to test your Night Sky knowledge. You can pick themed quizzes covering Satellites, Deep Space, Stars, Living in Space, Space History, Planets and Solar System. When the quiz finishes, you can see your score and share it with your friends by email or social media.
Night Sky Education Centre
This links to the Night Sky Education Resources webpage. This is an archive of free downloadable PDF’s for teachers with activity sheets for students, providing engaging lesson ideas to use in the classroom or at home. Each lesson is categorised by suggested student age (with an additional category for Youth Groups) and divided into activities for students and astronomy background information for educators and leaders in youth groups (Scouts, Guides and similar organisations). Every lesson idea also contains accessible learning tips to help set up Night Sky for everyone.
This page also includes videos demonstrating how to use some of Night Sky’s features.
New content is added to the Night Sky Educational Resources page every month.
Education Mode
Educators who have integrated Night Sky into their classes can request access to Education Mode. When Education Mode is enabled subscription reminders do not appear to allow an uninterrupted experience for students
Request access to Night Sky Education Mode by sending an email to support@nightsky.com from an email account affiliated with a verifiable educational institution. After verification, you will be emailed a link. Tap on this link on a device with Night Sky installed to activate Education Mode.
Send Night Sky+ as Gift – Night Sky+ Only
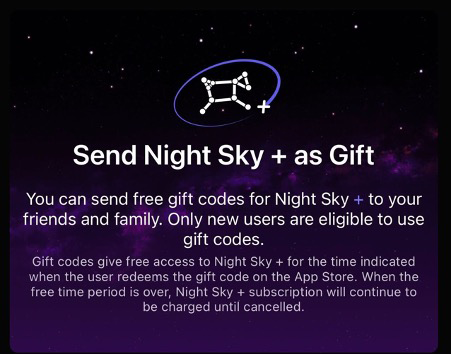
Night Sky+ users can gift a free Night Sky+ subscription to friends or family after they have been a + subscriber themselves for 6 months or more. Tap on this tile to access this option.
This option is available when you have subscribed to Night Sky+ for over six months. When the gifted time period ends, the subscription is charged.
 Settings
Use Settings to configure and customize your Night Sky settings. You can set your language, change your Night Sky preferences, choose events for notifications, and much more.
The settings for specific features are explained in the sections for those features. The following sections give some examples of common settings, including how to find them.
List of Settings
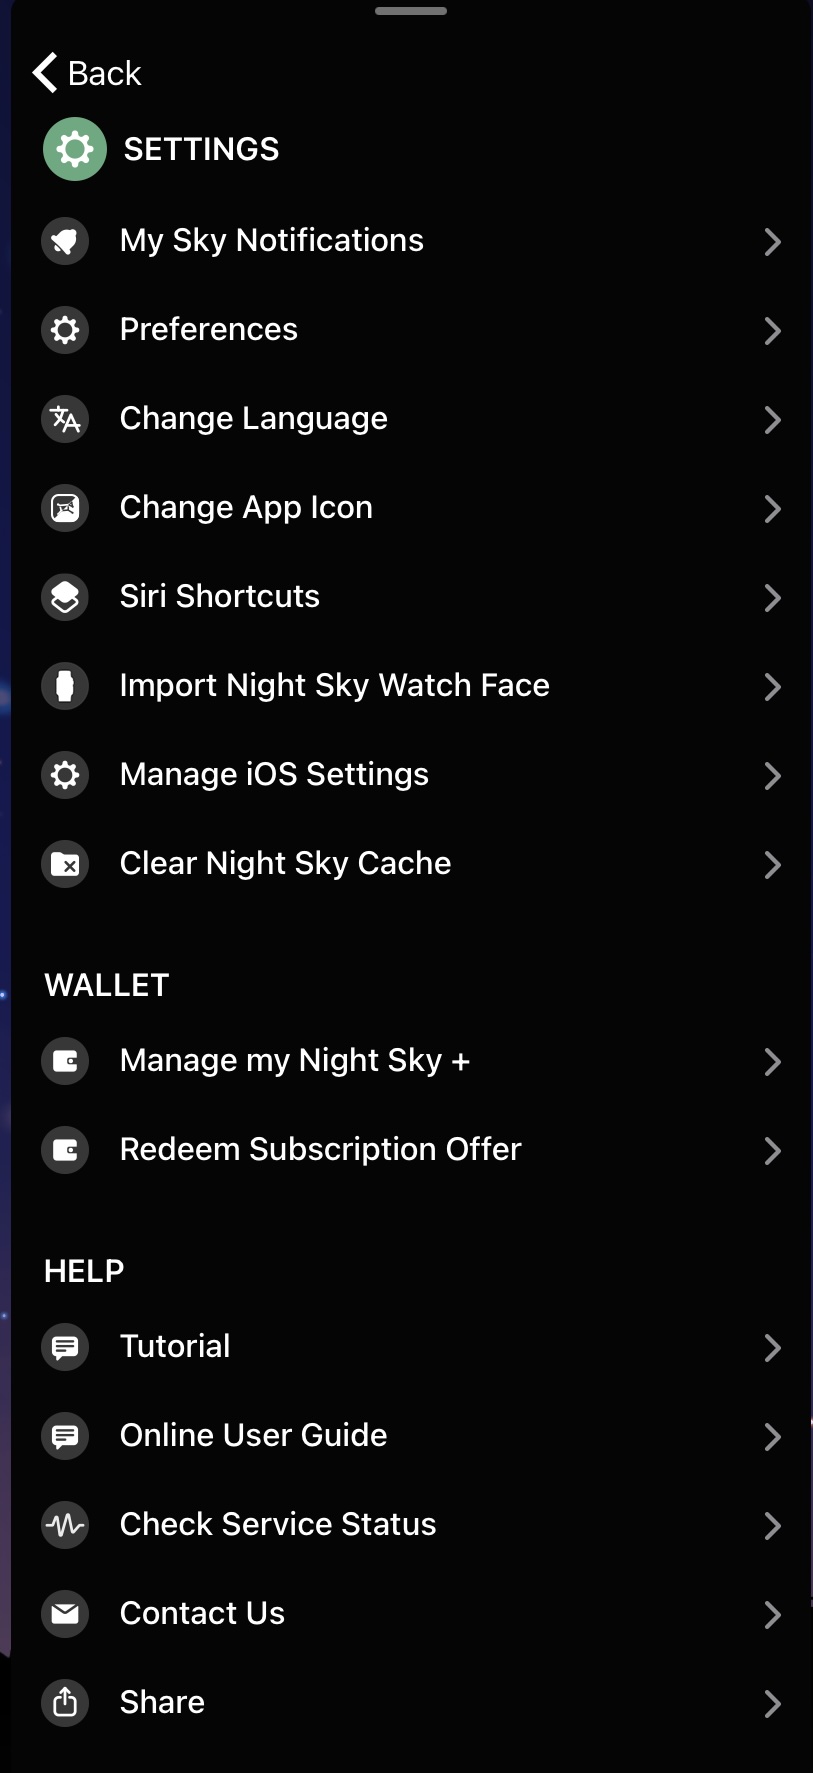
My Sky Notifications
Tap the + button in the top right to add your favourite sky objects to notifications
Preferences
The Preferences are described in their own section of this manual.
Change Language (iPhone/iPad only)
Touching this opens your device’s language settings. Night Sky 27 adds Bangla, Gujarati, Kannada, Malayalam, Marathi, Odia, Punjabi, Slovenian, Tamil, Telugu and Urdu. Choose your preferred available language in Settings.
Change App icon (Night Sky+ for iPhone/iPad only)
Tapping this opens a menu where you can select a new colour for the Night Sky icon.
Siri and Shortcuts (iPhone, iPad and Mac)
Ask Siri “What star is that?” or “Where is Mars?” to access Night Sky features. You can also use supported Night Sky actions in Shortcuts. See What’s new in Night Sky 27 for Siri and Spotlight discovery.
Import Night Sky Watch Face (iPhone only)
If you have an iPhone paired with your Apple Watch you can use this function to add the Night Sky face to your Apple Watch.
Manage iOS Settings (iPhone/iPad only)
This option takes you to your device’s Settings. Here you can allow Night Sky to access your Location, Calendar, Photos, Camera, Siri & Search, Notifications and Background App Refresh.
Clear Night Sky Cache
Use this to free up space on your device by removing unnecessary data.
Wallet
Manage My Night Sky +
Use this to open the screen where you can change or cancel your Night Sky+ subscription, upgrade to Night Sky Unlimited or restore past purchases. Note that cancelling subscriptions follows different procedures in Israel, South Africa and Turkey. Please contact the Apple Store if you have any queries about cancelling subscriptions.
Redeem Subscription Offer
If you have received a subscription discount code you can tap on this and you will be prompted to enter the code.
Help
Tutorial
Use this to take you to a short demonstration of Night Sky’s features.
Online User Guide
This links to a copy of this User Guide.
Check Service Status
Use this to see if any maintenance activities or faults are affecting Night Sky’s services in your area.
Contact us
This allows you to visit the official Night Sky and iCandi Apps Facebook, Instagram and Twitter accounts and to send emails to support@NightSky.com
Share
Touching this opens a menu with two more options. These are:
Share App
Use this to send a link to Night Sky to your friends and family.
Take Photo
Use this to take a screenshot from Night Sky’s Sky View and share it by email or social media.
Night Sky Unlimited
This gives you the option to become a Night Sky Unlimited member. In exchange for a one-off payment, Night Sky+ members get permanent access to all of the Night Sky+ content. Note that Night Sky Unlimited is an in-app one-off purchase and is not a subscription.
Preferences
Preferences
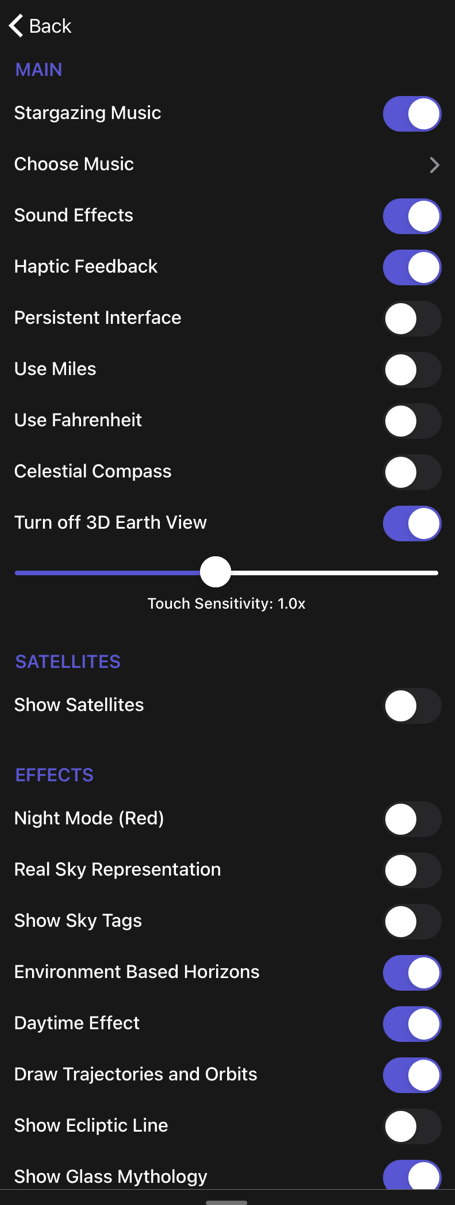
Stargazing Music
By setting this control to On Night Sky will play music to set the mood for stargazing.
Choose Music
Pick the musical background that suits you. There are five gentle and atmospheric pieces to choose from.
Sound Effects
Use this to change the sounds Night Sky plays when you get a notification, choose an option or other interaction.
Haptic Feedback
When this is activated you will feel a “tap” after you perform some actions (on supported devices only).
Turn System Haptics off or on.
Persistent Interface
Use this control to keep the interface menu on screen or permit it to fade out.
Use Miles
Kilometres are the default distance measurement in Night Sky. If you prefer you can switch to miles with this control.
Use Fahrenheit
Degrees Celsius are the default temperature measurement in Night Sky. If you prefer you can switch to degrees Fahrenheit with this control.
Celestial Compass
Use this to align your device with the compass in Sky View.
Turn off 3D Earth View (Night Sky+ only)
When this is set to off, zooming down on the Earth’s surface will not bring up the 3D Earth model.
Touch Sensitivity
This slider controls how responsive the screen will be to your finger movements.
Satellites
Show Satellites
Turning this on shows the location of bright Earth satellites in Sky View. When Show Satellites is selected you are given the option to turn on Rocket Bodies and Starlink satellites. If Rocket bodies is selected this will also display the brighter Rocket Bodies (discarded rocket stages and components) in Earth orbit. If Starlink satellites are selected this will also display the chains of Starlink satellites in Earth orbit.
Turning Show Satellites off will also cancel any selected satellite notifications.
Effects
Night Mode (Red)
This makes Night Sky appear with a dim red backlight. Using this mode when you are observing the sky helps to maintain your eyes’ dark adaptation.
Real Sky Representation
When this is selected, the sizes of planets, satellites and other objects are depicted with near realism in sky view. When this control is turned off, the sizes of planets, satellites and other objects are further exaggerated to make them easier to recognise.
Show Sky Tags
Turning off this control will hide all Sky Tags in Sky View.
Environment Based Horizons
Selecting this removes the line representing the horizon and applies a simulated environment (including buildings) to the horizon in Sky View.
Daytime Effect
When this is selected, a lighter blue day sky effect is applied in Sky View.
Draw Trajectories and Orbits
When this option is selected, touching a planet, satellite and some other objects in Sky View will display a dashed line representing its orbital path. The orbits of planets and recognised dwarf planets are shown in orange, Earth-orbiting satellite orbits are in red and the Moon’s orbit in blue.
Show Ecliptic
The Ecliptic is the mean plane of the planets in the Solar System. Turning this on shows it as a yellow dashed line in Sky View.
Show Meridian
Turning this on displays the meridian as a green dashed line. The meridian is the circle which passes through both the north and south celestial poles and the point in the sky directly above you (the zenith) and point directly beneath you (the nadir).
Show Equatorial Grid
Turning this on displays the grid used in the equatorial coordinate system used by astronomers. This grid appears in blue. The declination and hour angle values appear around the edge of the screen.
Show Azimuthal Grid
Selecting this option displays an altitude-azimuth (azimuthal) grid based on your position on the Earth’s surface. This grid appears in cyan.
Show Glass Mythology
This superimposes a semi-transparent image over the constellations on screen in Sky View. These images are artist’s renderings of the object, creature or legendary character each constellation represents. When you move away from the constellation, the Glass Constellation “melts” and fades away.
Stop Glass Mythology Melting
You can stop the Glass Constellations from fading away. They will remain continuously visible in Sky View.
Show Constellation Lines
When this is activated the brighter stars in a constellation are connected by narrow white lines. This makes it easier to pick out the constellation. When you move away from the constellation, the lines fade away.
Stop Text and Lines Disappearing
You can stop the Constellation Lines and associated text from fading away. They will remain continuously visible in Sky View.
Enable Messier Objects
Messier Objects are a set of 110 deep space objects in a catalogue originally created by astronomer Charles Messier. When this is activated labelled graphical depictions of each Messier object are displayed at the correct location in Sky View. These depictions are not to scale and may appear much brighter than the object appears in Earth’s sky.
Meteor Showers
You can use this control to activate an animated graphic with an identifier of each of the annual meteor showers. The animated graphic appears in the correct location for the origin point in the sky (known as the “radiant”) of the meteor shower and is displayed for a few days before and after the peak of the shower.
Hipparcos catalog
The Hipparcos catalogue is a list of over 118,200 stars. It was created by the European Space Agency.
When this is selected, every star in the Hipparcos catalogue is labelled with its identifier in Sky View. The identifier will be the letters “HIP” followed by a string of numbers. These appear as you zoom in on stars.
Accessibility
The slider bar can be used adjust the size of the text in Sky View.
Night Sky is compatible with Voiceover on iPhone/iPad and Mac. Voiceover can be turned on and off in your device’s Settings.
Notifications
Do Not Disturb
The slider bar can be used to limit notification messages and sounds to a time range you have selected.
Night Sky Aura
Night Sky Aura
Night Sky Aura can be accessed only if you have a ‘Night Sky + Aura’ subscription. Once subscribed you can tap the floating questions to directly ask Aura that question, or type your own question to Night Sky Aura directly in the search field. Night Sky Aura will then appear in a chat bubble interface to present the response. If appropriate Night Sky Aura also reveals action buttons inline to enable you to directly access data and features within Night Sky relevant to your conversation with Aura. Please note use of Night Sky Aura is subject to the Terms and Conditions of Use that are agreed to when starting Night Sky, and is intended for entertainment purposes only.
For Aura Tonight, Aura Live, Aura Anywhere and spoken questions, see What’s new in Night Sky 27.
Astrophotography (iPhone and iPad only)
Astrophotography (iPhone and iPad only)
Night Sky comes with a powerful suite of astrophotography tools which you can access through the Astrophotography tile in the Menu Interface. These tools are described below.
The images made in Night Sky are stored in Photos on your device.
Astrophotography Tools
 Photo/Video Mode
Use image mode to take still images and video mode to take videos
 Exposure and ISO settings
You can control how much light your camera lets in with these controls.
Turn ISO Lock on to manually override the auto light settings
The ISO sensitivity to light can be adjusted with the slider from 24 to 768.
Turn the exposure lock on to manually override the duration your camera absorbs light for.
Use the slide to manually set the time the camera absorbs light for from 0.001 second to 0.5 second.
Shorter exposures are possible with higher ISO settings but this will increase the “noise” in the image, reducing its quality. You can experiment to optimise these settings for the image you are making.
 Digital Focus
Turn the Focus Lock on to manually control the digital focus of the camera with a slider.
 Digital Zoom
Use this to manually control the digital zoom of the camera (x1 to x10) with a slider.
 Star and Satellite Trails
This allows you to capture the trails of stars and satellites. It leaves your camera’s lens open for several minutes. For best results your device should be left stationary while you do this.
 Night Mode
In this mode your camera becomes more sensitive but the images will be “noisier”. “Noise” is the term used to describe dots which may appear in your image.
 Noise reduction
This function will help to remove these dots.
 Object Optimisation
Select an option to use presets to automatically optimise your camera’s zoom and light input settings for capturing particular objects. You can select Moon, Stars and Constellations or Planet.
 Image Alignment Tools
Use this function to select one of five possible grids (2×2, 3×3, 5×5, 9×9). A grid is superimposed over your screen to help you to align the object(s) in your image. The grid will not appear in your image.
 Tutorial
This presents a short guide to the most important features in the Astrophotography tools.
 Exit
Exit
Use this to leave Astrophotography mode and return to the main Night Sky app.
Grand Orrery
Grand Orrery
Night Sky includes an augmented reality orrey which you can bring into your home, classroom or office. It accurately simulates the positions of the planets, Moon, Earth satellites and some NASA spacecraft exploring the Solar System.
Drag with two fingers to move the Solar System around the surrounding scene and pinch with two fingers change the scale of the orrey.
You can change the time and date represented by the orrey with the time and calendar bar at the bottom of the screen.
 This control can turn the background stars and constellations on or off.
 You can turn off the orbital paths of Solar System objects with this button.
 This button turns the artificial satellites and interplanetary missions on and off.
 Touch here to reorientate the Solar System to the direction you are facing.
 This button adjusts your camera’s light intensity. This allows you to change the brightness of the surroundings to make it easy to see the details of the orrery.
 This button turns on and off the relative sizing of the planets. This allows you to see the planets at their correct relative sizes.
 This button starts a short interactive tutorial demonstrating the features of the orrery.
Planetary Portals
Planetary Portals
This feature allows you to add augmented reality (AR) “portals” to other locations in the Solar System around your local environment. You can choose portals to the Sun, the planets, dwarf planets and their largest moons.
AR Portals supports People Occlusion with ARKIt 3.0 (iOS11 or above only). This means that a person can walk in front of a virtual object and it will appear behind them.
 Touch this to add a new Planetary Portal to your surroundings. A yellow box will appear on your screen. Move your device until this box is placed over the location where you want the portal to appear.
 Touching this button connects to other users’ devices so your friends and family can share the Planetary Portals experience.
 Touching this button refreshes the portals.
 This button starts a short interactive tutorial showing the Planetary Portals controls.
Night Sky Widget
Night Sky Widget
You can add the Night Sky Widget to your iPhone or iPad. You can also add a Night Sky widget to your lock screen.
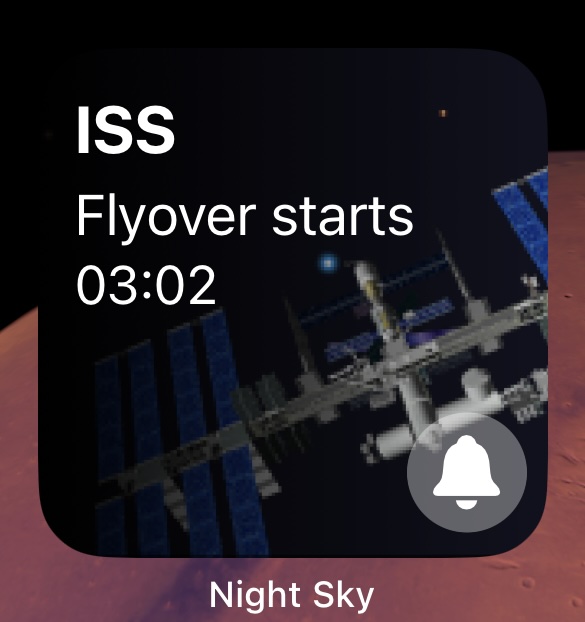
Night Sky supports Interactive Widgets. You can favorite an object from the Interactive Widget to get notifications about it rising in the future.
Night Sky supports StandBy by displaying objects rising in the sky.
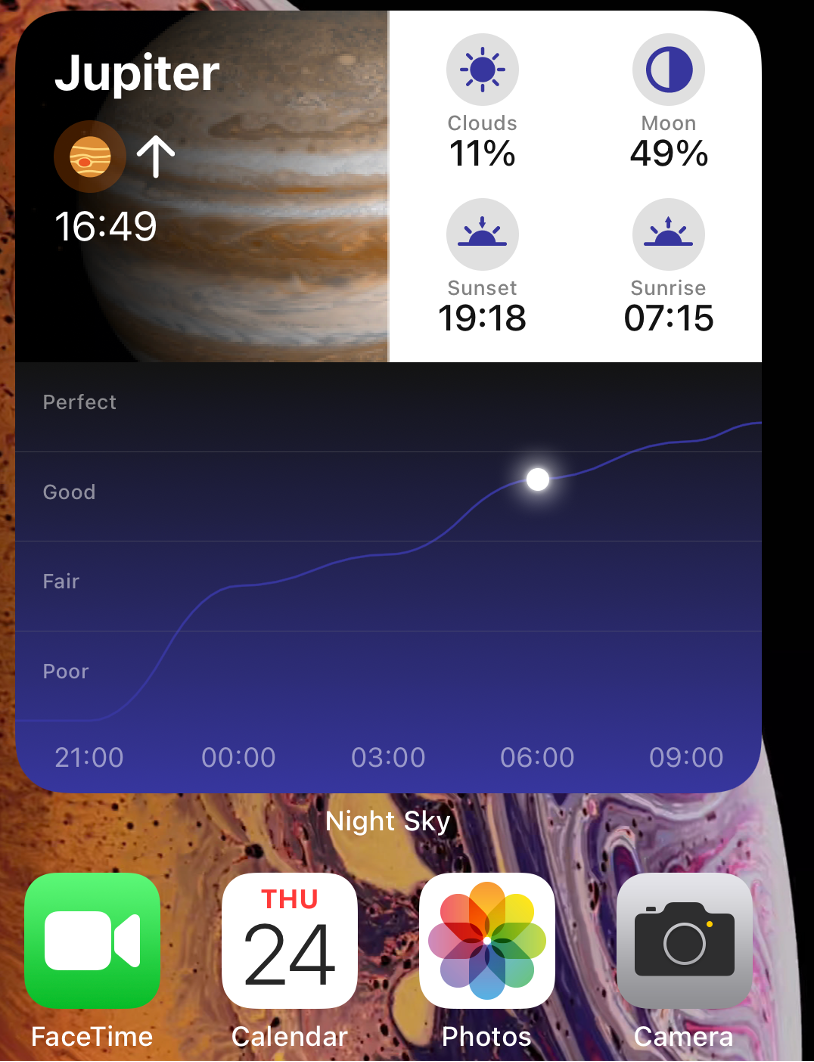
The Widget is available in three sizes:
• The small size Widget displays the name of the next object (ISS, Moon, Sun or planet) to rise or set at your location, the time this event will happen and an image of the object
• The medium size Widget adds the estimated cloud cover, current Moon phase, next sunset and sunrise times at your location.
• The large size Widget also shows a graph of the estimated stargazing conditions over the next 12 hours. A dot on the graph shows the time between sunset and sunrise when the weather conditions are projected to be best for star gazing.
• The small Night News headline Widget.
• The larger Night News headline Widget.
To add a Night Sky widget to your Home Screen
1. From the Home Screen, touch and hold a widget or an empty area until the apps jiggle.
2. Tap the Add button  in the upper-left corner.
3. Select the Night Sky widget, then swipe to select your preferred the size of widget and then tap Add Widget.
4. Tap Done.
You can also add the widget from Today View. From Today View, touch and hold the Night Sky widget until the quick actions menu opens, then tap Edit Home Screen. Drag the widget to the right edge of the screen until it appears on the Home Screen, then tap Done.
Night Sky on Apple TV
Night Sky on Apple TV
Night Sky is available on your Apple TV.
With your Apple TV remote you can select options from the Menu Bar at the top of the TV screen.
Live Sky Tours
Selecting Live Sky Tours displays further Options.
Live Sky View
This is similar to Sky View on iPhones or iPads. Use the Apple TV remote’s tracking pad to move your field of view. To activate the Space Travel tab tap on the bottom edge of the touchpad on the Apple TV remote. Exit Space Travel by tapping on the bottom edge of the touchpad again. You can zoom in and out by tapping the right side edge of the touchpad on the remote and then swiping up and down to adjust the zoom level. Tap on the right edge again to exit. Click on objects with the tracking pad to select them and see more information about them. Navigate back to previous views using the remote’s Menu button. You cannot create new Sky Tags in Apple TV but you can view Tags you have already created iPhone or iPad.
Tonight Tour
This is a sky tour from your current location.
Nearest Stargazing Site Tour
This is a sky tour from your nearest dark sky site for the current or the next day.
Apollo 11 – Night Sky+ only
This is a 3D simulation of the location where humans first landed on the Moon.
Apollo 15 – Night Sky+ only
This is a 3D simulation of a site where humans landed on the Moon in 1971.
Copernicus Crater – Night Sky+ only
This is a 3D simulation of a famous location on the Moon.
American Solar Eclipse – Night Sky+ only
This is a 3D recreation of this 2017 event.
Lunar Eclipse – Night Sky+ only
This is a 3D recreation of this 2011 event.
All tours are narrated.
My Tours
This enables you to browse previous tours you have created.
Custom Tour
You can create tours of the sky from your choice of location. Click on this option then scroll around the map and click the location where you would like the custom tour to view the sky. You will then be offered options to choose the time and date you would like the tour to cover.
Object Search
This enables you search Night Sky’s database to find out more information on celestial objects. You can search alphabetically or by scrolling down the list.
Mirroring Night Sky to your Apple TV
You can also access Night Sky on a TV by connecting your iPhone or iPad to the same Wi-Fi network as your Apple TV or AirPlay 2-compatible smart TV and activating Screen Mirroring.
Night Sky on Apple Watch
Night Sky on Apple Watch
Use the Apple Watch App on a paired iPhone to install the Night Sky App on your Apple Watch.
The Night Sky Apple Watch App puts Sky View on to the user’s wrist.
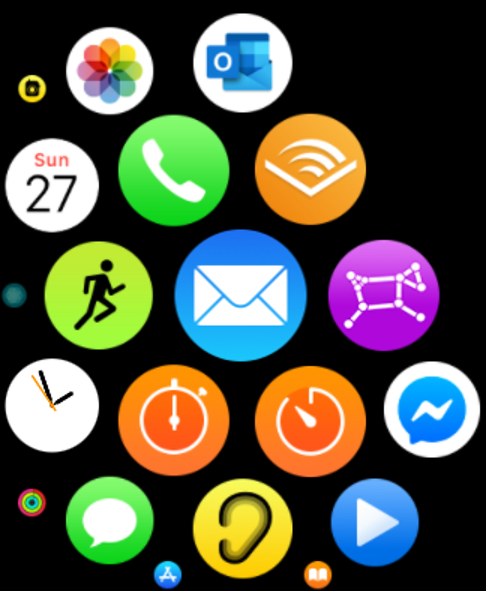
You can launch Night Sky by tapping the Night Sky icon on your Apple Watch’s home screen or a Watch Face complication.
Some Watch models (Series 5 and up) will calibrate Night Sky automatically but on earlier Watch versions when you launch Night Sky you are invited to manually calibrate the app. To do this find the Moon in the sky, turn to face it and tap the screen. If this is not possible tap “Can’t see the Moon” and compass mode will appear, swipe the screen to align it in a known direction.
Once the Apple Watch has been aligned, Sky View is displayed. Sky view on an Apple Watch is very similar to Sky View on Macs and iOS devices. As you hold up your Apple Watch and move it, the Sky View will move in response.
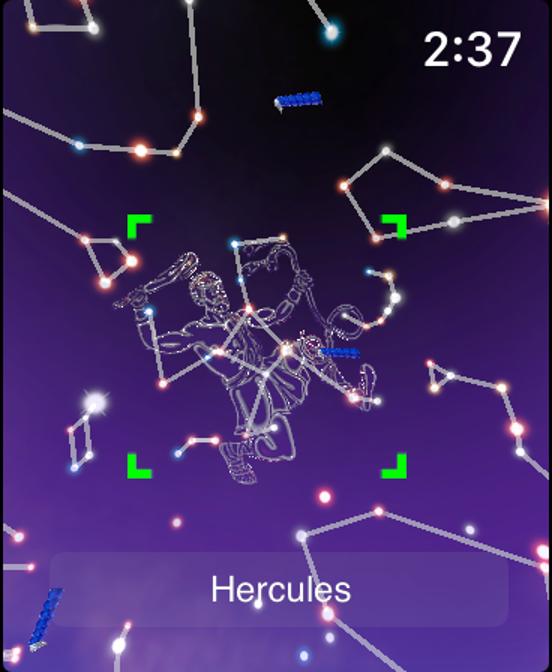
As you move the Apple Watch a central green cursor will highlight and identify objects. Tap this cursor to select a highlighted object.
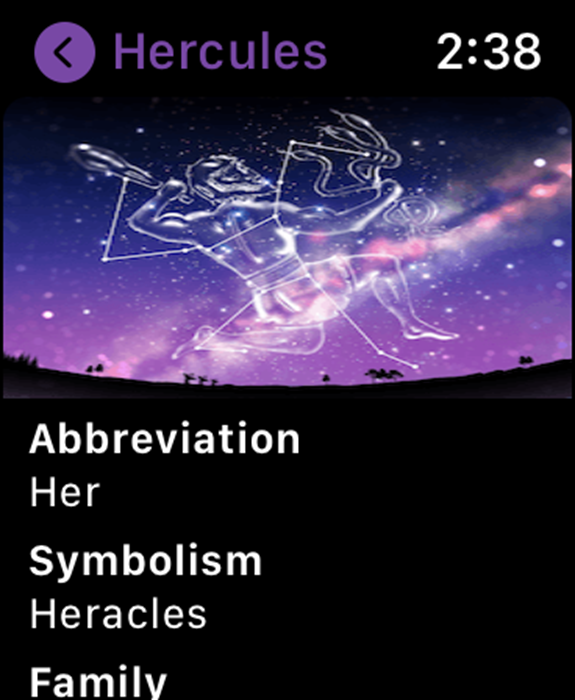
To see more information about it tap the object’s name. You can scroll through this by rotating the Digital Crown.
You can start a narrated sky tour by tapping this icon in the upper left of the watch face.
Night Mode is selected by tapping this icon in the upper right. This makes Night Sky appear with a dim red backlight. Use this mode when you are observing the sky to help to maintain your eyes’ dark adaptation.
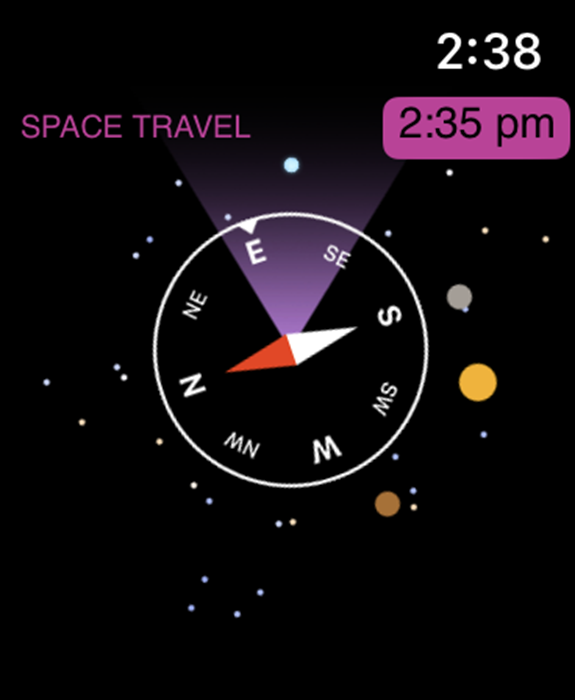
Holding the Apple Watch horizontally will change Night Sky to compass mode.
The sky is displayed at the current time, turn the Digital Crown to advance or turn back the time (Space Travel mode).
You can import the Night Sky watch face from a paired iPhone using Import Night Sky Watch Face (in Settings).
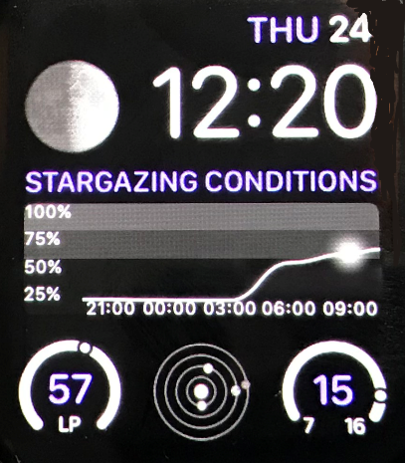
The Night Sky watch face displays the current time and date and other data. These include:
• a graphic of the current Moon phase.
• a graph of the estimated stargazing conditions over the next 12 hours. A dot on the graph indicates the time between sunset and sunrise when the weather conditions are projected to be best for star gazing.
• an estimate of the light pollution (LP) at your location.
• a diagram showing the Sun and the orbits of Mercury, Venus and Earth. At a glance you can see the positions of these planets.
• The current temperature compared to today’s minimum and maximum temperatures at your location.
You can also add the Night Sky complication to any watch face that supports complications. You can do this with the Apple Watch app on a paired iPhone.
Removing Night Sky from your iPad or iPhone
Removing Night Sky from your iPad or iPhone
You can remove Night Sky from your device by following these steps.
1. Touch and hold the app.
2. Tap Delete App.
3. Tap Delete.
If you wish to delete Night sky, you should also cancel your Night Sky+ subscription if you have one.
Troubleshooting
Troubleshooting
If Night Sky isn’t working properly, you can quit the app and then try to restart it. Restarting Night Sky may resolve the problem.
If restarting Night Sky doesn’t solve your problem, try restarting your device.
You should also ensure that you are using the current version of Night Sky.
If Night Sky is not showing your location or other local data correctly, ensure that you have given the app permission to access your location data and that your device is connected to a phone network or has a wifi connection. Please note that manually entering your location into the World Traveller Tile will not update your location data.
If Sky View is not aligned with the sky above you, please make sure you are not using a third party case on your device. These can sometimes interfere with your device’s compass causing an inaccurate reading. You can also tap on the Sky Alignment button and swipe left or right to fine align Sky View with the real sky. Tap on this button again to complete this alignment process.
Support
Support
If you need further assistance you can email support. We will endeavour to respond to any query within 48 hours.
Copyright
Copyright
Night Sky and all contents © iCandi Apps Limited
iCandi Apps Limited trading as iCandi Apps ® – Private Limited Company Registered in England & Wales
Registered address: iCandi Apps Limited, Unit B, Rubery House, The Avenue, Birmingham, West Midlands, B45 9AL, United Kingdom
Private Limited Company Number: 7936208
VAT Registration Number: GB 131 6146 46
® Registered European Community Trademark Number: 011830296
® Registered United States of America Trademark Number: 4775066
Apple, Apple TV, Apple Watch, iPad, iPad mini, iPad Pro, iPhone, iPod, iPod touch, iTunes and Siri are trademarks of Apple Inc., registered in the U.S. and other countries.
iOS, iPadOS, macOS, watchOS and tvOS are trademarks of Apple Inc.